Setup an Existing Account
This walks through how to set up and configure an existing Bandwidth account for use with our Number Management, HTTP Voice, and HTTP Messaging APIs — either through the Bandwidth App or programmatically via the Number Management API. Requests use OAuth 2.0 bearer token authentication — see Credentials & Authentication to obtain a token.
Don't have an account yet? Start a free trial instead.
Now that we've covered the hierarchical structure of your Bandwidth account, let's talk about how to complete your set-up.
Assumptions
- You have been contracted and given access to your Bandwidth Account
- Your account is enabled for HTTP Voice and/or Messaging
- You have administrator access on the account to create users and change roles
Choose your setup path
Bandwidth recommends that all new users complete their account set-up using the Bandwidth App user interface to best get acquainted with our unique account structure. After you've familiarized yourself with these concepts, you may want to automate your set-up and programmatically configure your Sub-Accounts, Locations, and Applications instead.
- New to Bandwidth's account structure? Use the Bandwidth App below.
- Already comfortable with our Number Management API and account structure? Use the API below.
Setting up via the Bandwidth App
App Setup Steps
Create a Sub-Account (Site)
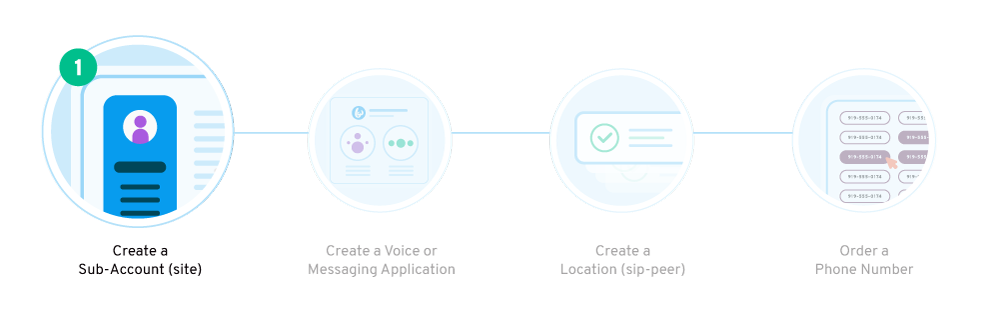
Once you log into the Bandwidth App, the first thing you need to do is set up your initial Sub-account. Metaphorically speaking, if you were to look at the Account as a filing cabinet, the Sub-accounts can be best visualized as the drawers.
Many users choose to just keep a single Sub-Account. Whereas others create two to represent Development & Production environments.
- In the top navigation bar, click Account, select Sub-accounts, and then click Add Sub-account.
- Enter the required information and click Create Sub-account.
Your Sub-account contains a unique Site ID, you will need to reference this for our Number Management API requests.
Sub-Account Fields
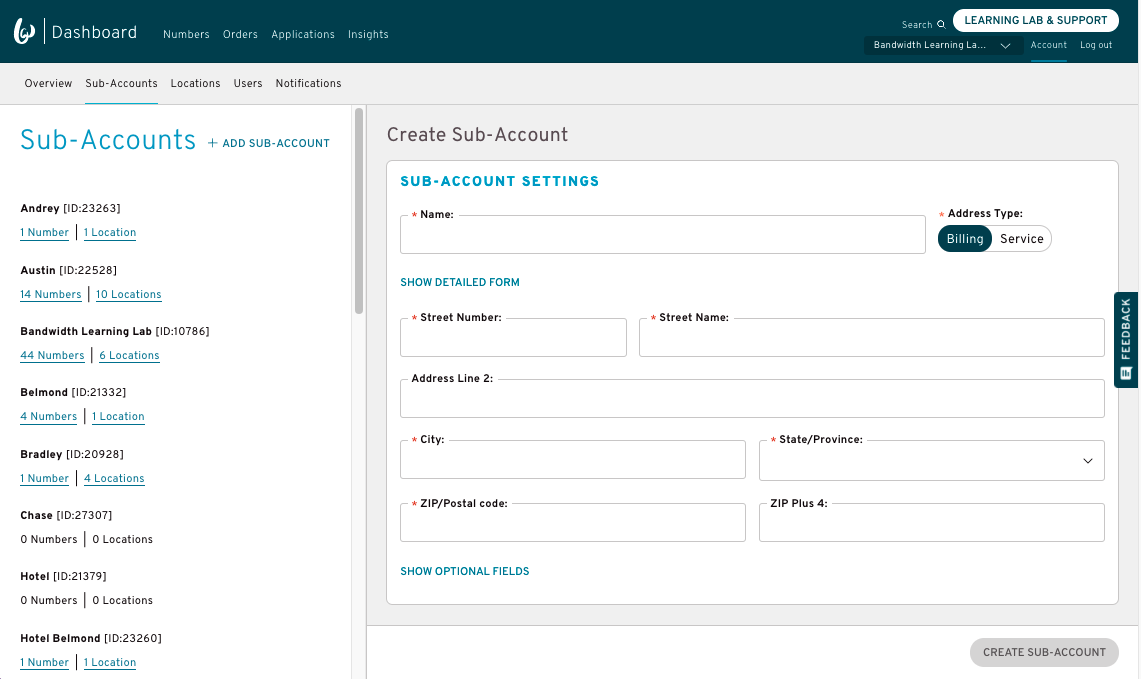
| Field Name | Mandatory | Description |
|---|---|---|
| Name | Yes | Sub-Account Name |
| Address Type | Yes | Billing or Service. For record purposes only, does not affect billing. |
| Street Number | Yes | Street number of address |
| Street Name | Yes | Street name of address |
| Address Line 2 | No | Optional second address line (ex Unit 123) |
| City | Yes | City |
| State | Yes | State |
| Zip/Postal Code | Yes | Postal Code |
| ZIP Plus 4 | No | Optional +4 Postal Code |
| Customer ID | No | Optional ID for your reference |
| Customer Name | No | Optional Name for your reference |
| Description | No | Optional Description for your reference |
For a self-guided training tutorial, click on Learning Lab & Support in the Bandwidth App and take a look at the Onboarding Guides!
Create an Application
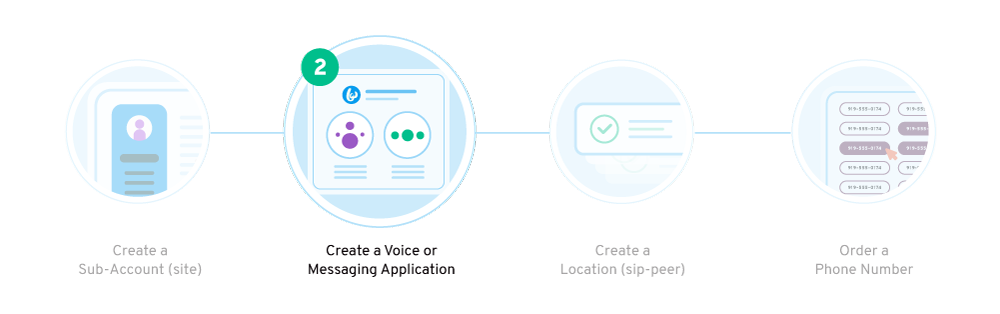
For more information about our applications API, check out our Applications Guide.
Create a Voice Application
To begin using your Bandwidth phone numbers for Voice APIs, create a Voice Application and then associate it with your phone number's Location:
- In the top navigation bar, click Applications, and then click Add Application.
- Provide an Application name (we recommend you use something that identifies what the application will do).
- Under Application type, select Voice. Note: Once your application is created, you won't be able to change the application type.
- Enter your Callback URL(s)
- Click Create Application
Voice Application Fields
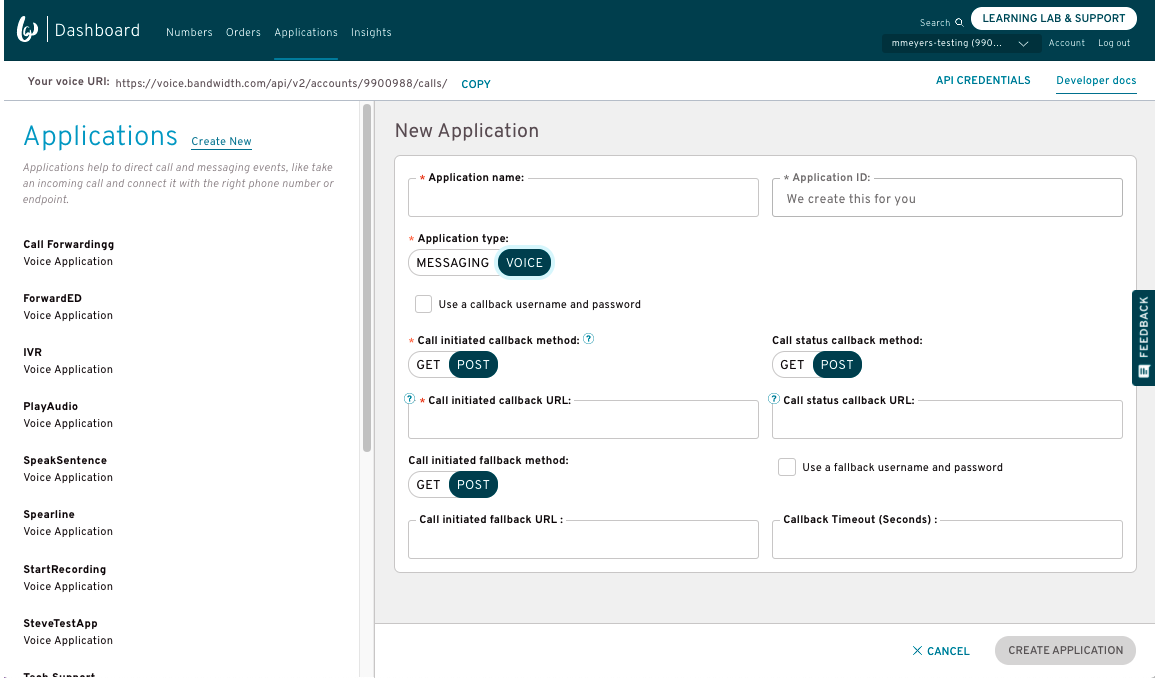
| Field Name | Mandatory | Description |
|---|---|---|
| Application Name | Yes | Custom application name |
| Application ID | Yes | Unique application ID needed for API calls - Bandwidth creates this for you |
| Application Type | Yes | VOICE or MESSAGING |
| Call Initiated Callback Method | Yes | REST method for callbacks. POST gives a JSON object in the request body (recommended). GET passes the callback in query parameters |
| Call Initiated Callback URL | Yes | URL to send call initiated (inbound calls) events to |
| Call Status Callback Method | No | REST method for callbacks. POST gives a JSON object in the request body (recommended). GET passes the callback in query parameters |
| Call Status Callback URL | No | URL to send call status events to |
| Callback User ID | No | Optional user id bandwidth sends in the Authorization header of the callback |
| Callback Password | No | Optional password bandwidth sends in the Authorization header of the callback |
| Call Initiated Fallback Method | No | REST method for callbacks. POST gives a JSON object in the request body (recommended). GET passes the callback in query parameters |
| Call Initiated Fallback URL | No | Fallback URL to send call initiated (inbound calls) events to |
| Call Status Fallback Method | No | REST method for callbacks. POST gives a JSON object in the request body (recommended). GET passes the callback in query parameters |
| Call Status Fallback URL | No | Fallback URL to send call status events to |
| Fallback User ID | No | Optional user id bandwidth sends in the Authorization header of the callback |
| Fallback Password | No | Optional password bandwidth sends in the Authorization header of the callback |
Create a Messaging Application
To begin using your Bandwidth phone numbers for Messaging APIs, create a Messaging Application and then associate it with your phone number's Location:
- In the top navigation bar, click Applications, and then click Add Application.
- Provide the Application name (we recommend you use something that identifies what the application will do).
- Under Application type, select Messaging. Note: Once your application is created, you won't be able to change the application type.
- Enter your callback URL(s)
- Select the types of callbacks you want to receive
- Click Create Application
Messaging Application Fields
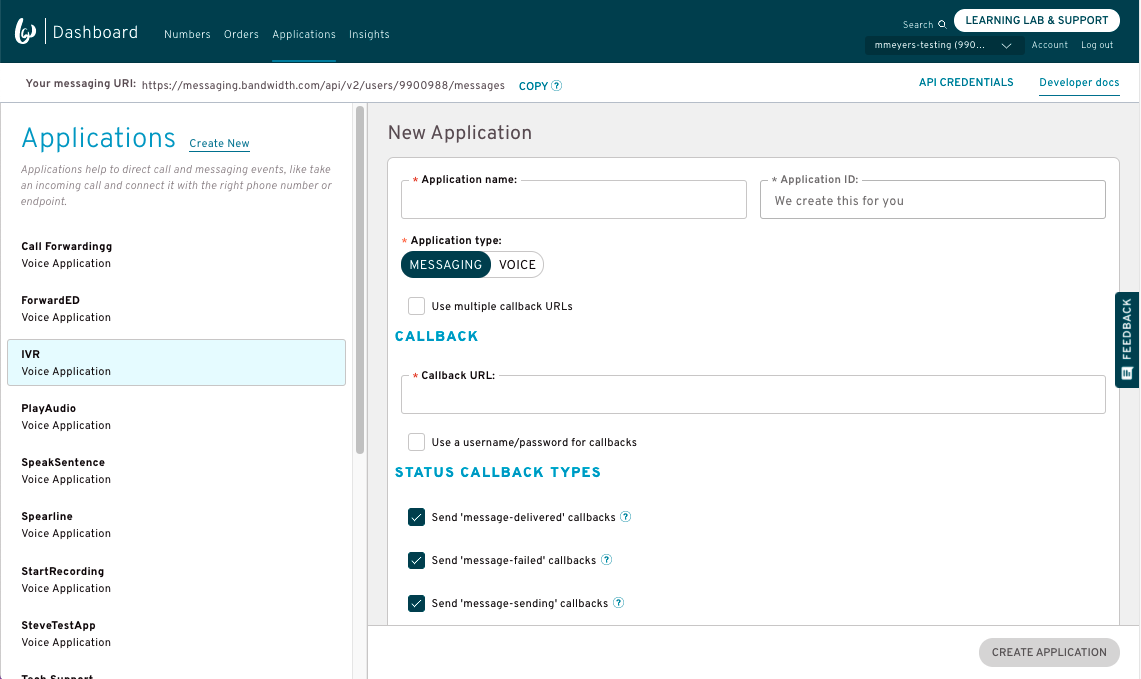
| Field Name | Mandatory | Description |
|---|---|---|
| Application Name | Yes | Custom application name |
| Application ID | Yes | Unique application ID needed for API calls - Bandwidth creates this for you |
| Application Type | Yes | VOICE or MESSAGING |
| Use Multiple Callback URLs | No | Optional toggle to allow you to split callbacks to different URLs for inbound and outbound messages |
| (Inbound) Callback URL | Yes | URL to send inbound (or all) message callbacks to |
| Inbound Callback User ID | No | Optional user id bandwidth sends in the Authorization header of the callback |
| Inbound Callback Password | No | Optional password bandwidth sends in the Authorization header of the callback |
| Status Callback URL | No | URL to send status (outbound) message callbacks to |
| Status Callback User ID | No | Optional user id bandwidth sends in the Authorization header of the callback |
| Status Callback Password | No | Optional password bandwidth sends in the Authorization header of the callback |
Send message-delivered Callbacks | No | Optional toggle to turn on/off message-delivered callbacks events |
Send message-failed Callbacks | No | Optional toggle to turn on/off message-failed callbacks events |
Send message-sending Callbacks | No | Optional toggle to turn on/off message-sending callbacks events |
Create a Location (SIP Peer)
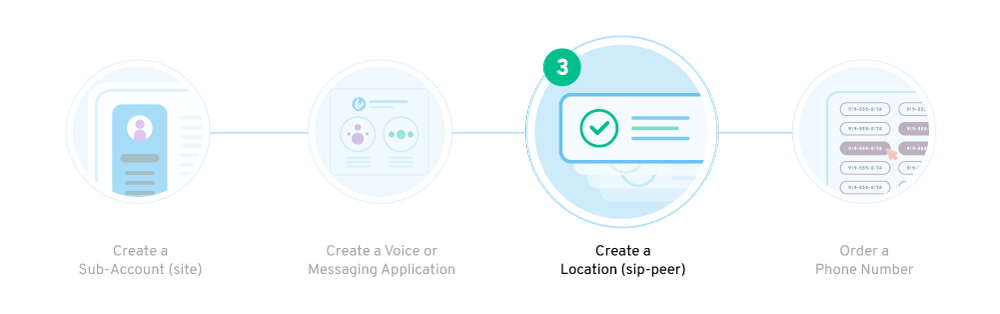
A Location is where you'll link your Application and provision other routing settings. When a phone number is added to a Location, it will inherit the settings and properties of that Location.
Link your Application with a Location:
- After you've created your Application, navigate to the Associated Locations section of the newly created application
- Click Create a Location.
- On the Locations Settings page, select a Sub-Account.
- Type in a Location Name and optional description. You'll order and port phone numbers to a Location. Give it a name that's easily identifiable.
- If there is no default location linked to your chosen sub-account already, enable
Default Location - Select Voice Protocol (HTTP or SIP, if applicable).
- Note: You need to set voice protocol as
HTTPto link it to a voice application
- Note: You need to set voice protocol as
- Click SMS Enabled (if applicable)
- Enable Toll Free or Short Code SMS (if applicable)
- Select zones for international messaging (if applicable)
- Ensure SMS protocol is
HTTP - Ensure
V2 Messagingis toggled ON - Associate the proper Messaging Application
Location Fields
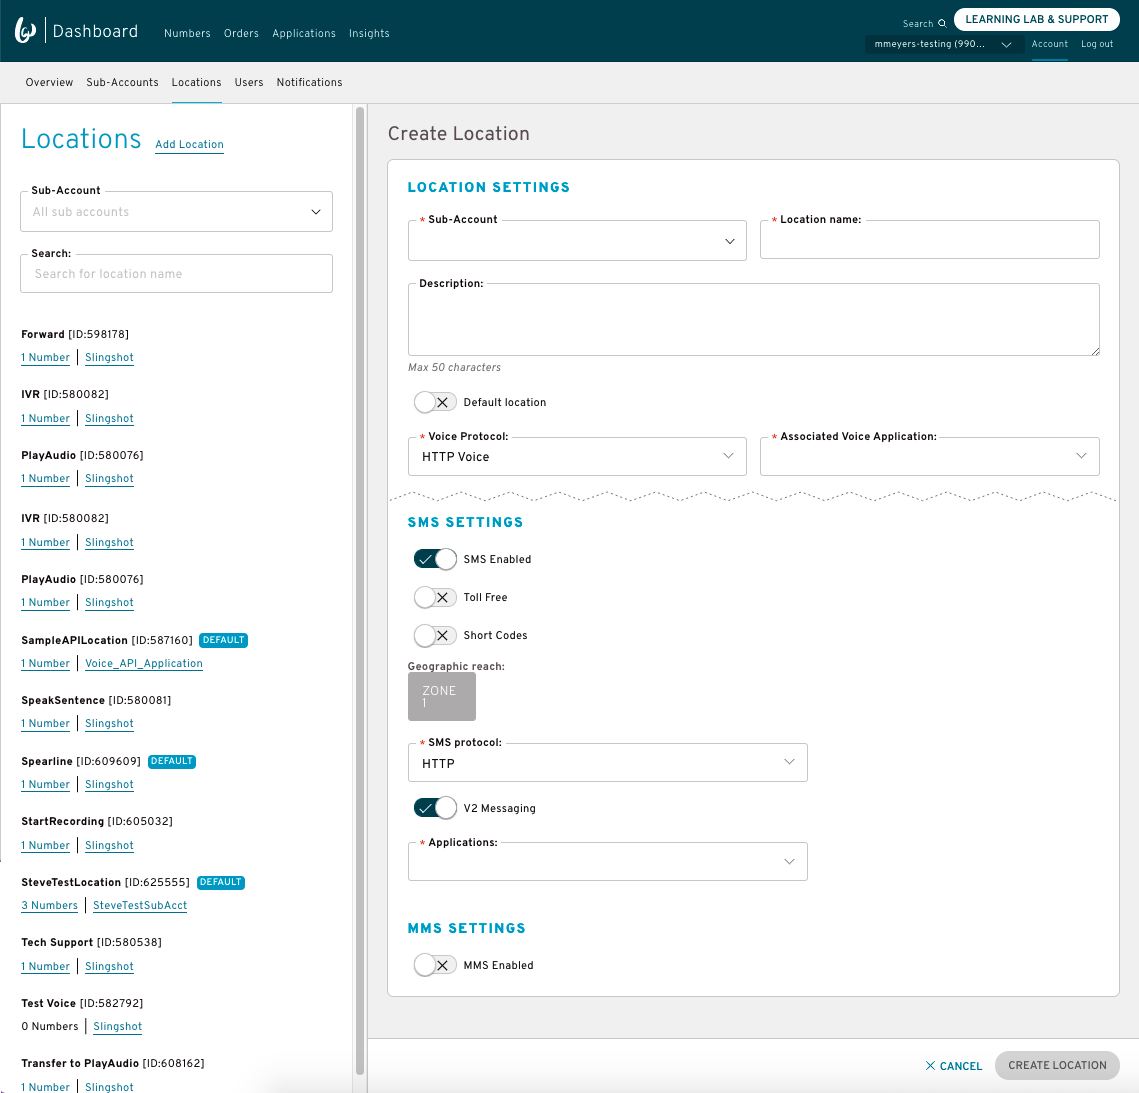
| Field Name | Mandatory | Description |
|---|---|---|
| Sub-Account | Yes | The parent sub account of the new location |
| Location Name | Yes | Custom location name |
| Description | No | Optional location description |
| Default Location | No | Sub-accounts require one default location. This must be toggled on if it is the first/only location created under a sub-account |
| Voice Protocol | Yes | SIP or HTTP - determines what protocol is used for calls to/from the telephone numbers in the location |
| Associated Voice Location | Yes (if HTTP voice) | If using HTTP voice, the application you wish to associate. When calls are made to the numbers on this location, Bandwidth sends a webhook to the callback URL of the associated application |
| SMS Enabled | No | Toggle to enable/disable messaging capabilities for all telephone numbers in the location |
| Toll Free SMS | No | Toggle to enable/disable messaging capabilities for toll-free numbers in the location |
| Short Code SMS | No | Toggle to enable/disable messaging capabilities for short codes in the location |
| Geographic Reach | Yes (if SMS enabled) | Toggle capabilities to certain geographical areas. Check our Messaging Reach Matrix to see which zones correspond to different countries |
| SMS Protocol | Yes (if SMS enabled) | SMPP or HTTP - determines what protocol is used for messages to/from the telephone numbers in the location |
| V2 Messaging | Yes (if HTTP SMS) | Required if using the current V2 messaging API |
| Applications (Messaging) | Yes (if HTTP SMS) | If using HTTP messaging, the application you wish to associate. When messages are sent to/from the numbers on this location, Bandwidth sends a webhook to the callback URL(s) of the associated application |
| MMS Enabled | No | Toggle on/off MMS capabilities for all telephone numbers in the location |
| MMS Protocol | Yes (if MMS enabled) | SMPP or HTTP - determines what protocol is used for messages to/from the telephone numbers in the location |
Setting up via the API
Unless you are already comfortable with our Number Management API and Bandwidth account structures, it is recommended that you follow the App setup path above instead of using this programmatic path.
API Setup Steps
- Create Sub-Account
- Create a Location
- Enable Services for Location
- Order a Phone Number
- Create an Application
Create a Sub-Account (Site) via the API
To create a Sub-Account, also referred to as a site, follow the instructions below.
Request URL
POSThttps://api.bandwidth.com/api/accounts/{accountId}/sites
Request Body Fields
The fields below should be formatted as XML elements and put in the request body as shown in the example below.
| Field | Required | Description |
|---|---|---|
Name | Yes | The name of the site. Max length of 10 characters |
Description | No | The description of the site |
CustomerProvidedID | No | Optional custom ID to assign to your application. Max length of 10 characters |
CustomerName | No | Optional custom name to assign to your application. Max length of 50 characters |
Address | Yes | The address of the site |
Address.HouseNumber | Yes | The number of the house |
Address.HousePrefix | No | The prefix of the house |
Address.HouseSuffix | No | The suffix of the house |
Address.StreetName | Yes | The name of the street |
Address.StreetSuffix | No | The suffix of the street |
Address.AddressLine2 | No | The optional second line of the address (apartment, extension, etc) |
Address.City | Yes | The city of the address |
Address.StateCode | Yes | The 2 character state code |
Address.Zip | Yes | The 6 digit zip code |
Address.PlusFour | No | The 4 digit zip code extension |
Address.County | No | The county of the address |
Address.Country | No | The country of the address |
Address.AddressType | Yes | The type of the address. Must be Billing or Service |
Example
- Request
- Response
POST https://api.bandwidth.com/api/accounts/{accountId}/sites HTTP/1.1
Content-Type: application/xml; charset=utf-8
Authorization: Bearer {YOUR_ACCESS_TOKEN}

<Site>
  <Name>SetupTest</Name>
  <Description>Programmatic Setup Test</Description>
  <CustomerName>BW</CustomerName>
  <Address>
    <HouseNumber>900</HouseNumber>
    <StreetName>Main Campus Dr</StreetName>
    <City>RALEIGH</City>
    <StateCode>NC</StateCode>
    <Zip>27606</Zip>
    <AddressType>Billing</AddressType>
  </Address>
</Site>
HTTP/1.1 201 Created
Content-Type: application/xml

<?xml version="1.0" encoding="UTF-8" standalone="yes"?>
<SiteResponse>
    <Site>
        <Id>12345</Id>
        <Name>SetupTest</Name>
        <Description>Programmatic Setup Test</Description>
        <CustomerName>BW</CustomerName>
        <Address>
            <HouseNumber>900</HouseNumber>
            <StreetName>Main Campus Dr</StreetName>
            <City>RALEIGH</City>
            <StateCode>NC</StateCode>
            <Zip>27606</Zip>
            <Country>United States</Country>
            <AddressType>Billing</AddressType>
        </Address>
    </Site>
</SiteResponse>
Create a Location (SIP Peer) via the API
To create a Location, also referred to as a SIP Peer, follow the instructions below.
Request URL
The siteId in this URL refers to the site you would like to become the parent sub account of the new location.
It can be retrieved from the response of the site's creation request, via the App, or by performing a GET request on the /sites endpoint and looking at the <Id> tag for your site.
https://api.bandwidth.com/api/accounts/{accountId}/sites/{siteId}/sippeers
Request Body Fields
The fields below should be formatted as XML elements and put in the request body as shown in the example below.
| Field | Required | Description |
|---|---|---|
PeerName | Yes | Plain text name of the Location (sippeer) |
IsDefaultPeer | No | Boolean: true or false. The Default SIP Peer is the default "destination" for any Telephone Numbers that are ordered for the Site in which the SIP Peer resides. Each sub-account (site) can have only 1 default SIP Peer. You can configure multiple SIP Peers on a Site |
Example
- Request
- Response
POST https://api.bandwidth.com/api/accounts/{accountId}/sites/{siteId}/sippeers HTTP/1.1
Content-Type: application/xml; charset=utf-8
Authorization: Bearer {YOUR_ACCESS_TOKEN}

<SipPeer>
  <PeerName>Setup Test SIP Peer</PeerName>
  <IsDefaultPeer>true</IsDefaultPeer>
</SipPeer>
HTTP/1.1 201 Created
Content-Type: application/xml
Location: https://{basePath}/accounts/{accountId}/sites/{siteId}/sippeers/{sippeerId}
Enable SMS for Location
In order to use HTTP messaging on your account, you need to enable SMS and MMS for each location.
Request URL
The sippeerId in this URL refers to the location you would like to enable SMS on.
It can be retrieved from the Location header of the location creation response, via the Dashbaord UI, or by performing a GET request on the /sites/{siteId}/sippeers endpoint and looking at the <PeerId> tag for your Location.
https://api.bandwidth.com/api/accounts/{accountId}/sites/{siteId}/sippeers/{sippeerId}/products/messaging/features/sms
Request Body Fields
The fields below should be formatted as XML elements and put in the request body as shown in the example below.
| Field | Required | Description |
|---|---|---|
TollFree | Yes | Boolean: true or false. Will enable texting to and from toll-free phone numbers |
ShortCode | Yes | Boolean: true or false. Will enable texting to and from short codes |
Protocol | Yes | MUST BE SET TO HTTP |
Zone1 | Yes | MUST BE SET TO: true |
Zone2 | Yes | Boolean: true or false. |
Zone3 | Yes | Boolean: true or false. |
Zone4 | Yes | Boolean: true or false. |
Zone5 | Yes | Boolean: true or false. |
Example
- Request
- Response
POST https://api.bandwidth.com/api/accounts/{accountId}/sites/{siteId}/sippeers/{sippeerId}/products/messaging/features/sms HTTP/1.1
Content-Type: application/xml; charset=utf-8
Authorization: Bearer {YOUR_ACCESS_TOKEN}

<SipPeerSmsFeature>
  <SipPeerSmsFeatureSettings>
    <TollFree>true</TollFree>
    <ShortCode>true</ShortCode>
    <Protocol>HTTP</Protocol>
    <Zone1>true</Zone1>
    <Zone2>true</Zone2>
    <Zone3>true</Zone3>
    <Zone4>true</Zone4>
    <Zone5>true</Zone5>
  </SipPeerSmsFeatureSettings>
  <HttpSettings />
</SipPeerSmsFeature>
HTTP/1.1 201 Created
Content-Type: application/xml

<?xml version="1.0" encoding="UTF-8" standalone="yes"?>
<SipPeerSmsFeatureResponse>
    <SipPeerSmsFeature>
        <SipPeerSmsFeatureSettings>
            <TollFree>true</TollFree>
            <ShortCode>true</ShortCode>
            <Protocol>HTTP</Protocol>
            <Zone1>true</Zone1>
            <Zone2>true</Zone2>
            <Zone3>true</Zone3>
            <Zone4>true</Zone4>
            <Zone5>true</Zone5>
        </SipPeerSmsFeatureSettings>
        <HttpSettings>
            <ProxyPeerId>569238</ProxyPeerId>
        </HttpSettings>
    </SipPeerSmsFeature>
</SipPeerSmsFeatureResponse>
Enable MMS for Location
In order to use HTTP messaging on your account, you need to enable SMS and MMS for each location.
MMS can only be enabled once SMS has been enabled. Attempting to enable MMS before SMS will result in a 400 Bad Request.
Request URL
The sippeerId in this URL refers to the location you would like to enable MMS on.
It can be retrieved from the Location header of the location creation response, via the Dashbaord UI, or by performing a GET request on the /sites/{siteId}/sippeers endpoint and looking at the <PeerId> tag for your Location.
https://api.bandwidth.com/api/accounts/{accountId}/sites/{siteId}/sippeers/{sippeerId}/products/messaging/features/mms
Request Body Fields
The fields below should be formatted as XML elements and put in the request body as shown in the example below.
| Field | Required | Description |
|---|---|---|
Protocol | Yes | MUST BE SET TO HTTP |
Example
- Request
- Response
POST https://api.bandwidth.com/api/accounts/{accountId}/sites/{siteId}/sippeers/{sippeerId}/products/messaging/features/mms HTTP/1.1
Content-Type: application/xml; charset=utf-8
Authorization: Bearer {YOUR_ACCESS_TOKEN}

<MmsFeature>
  <MmsSettings>
    <Protocol>HTTP</Protocol>
  </MmsSettings>
  <Protocols>
    <HTTP>
      <HttpSettings />
    </HTTP>
  </Protocols>
</MmsFeature>
HTTP/1.1 201 Created
Content-Type: application/xml

<?xml version="1.0" encoding="UTF-8" standalone="yes"?>
<MmsFeatureResponse>
    <MmsFeature>
        <MmsSettings>
            <Protocol>HTTP</Protocol>
        </MmsSettings>
        <Protocols>
            <HTTP>
                <HttpSettings>
                    <ProxyPeerId>569238</ProxyPeerId>
                </HttpSettings>
            </HTTP>
        </Protocols>
    </MmsFeature>
</MmsFeatureResponse>
Create an Application via the API
After assigning the phone number you've ordered to a location, you must create a messaging or voice application and assign it to the location that has the phone number you would like to use.
For more information about our applications API, check out our Applications Guide.
Create a Messaging Application via the API
This section walks though creating a messaging application.
Request URL
POSThttps://api.bandwidth.com/api/accounts/{accountId}/applications
Request Body Fields
The fields below should be formatted as XML elements and put in the request body as shown in the example below.
| Field | Required | Description |
|---|---|---|
ServiceType | Yes | Set to Messaging-V2 |
AppName | Yes | Plain text name of the application |
MsgCallbackUrl | Yes | Url to receive all message events |
CallbackCreds | No | Basic auth credentials to apply to your message events |
CallbackCreds.UserId | No | Basic auth UserId |
CallbackCreds.Password | No | Basic auth Password |
Example
- Request
- Response
POST https://api.bandwidth.com/api/accounts/{accountId}/applications HTTP/1.1
Content-Type: application/xml; charset=utf-8
Authorization: Bearer {YOUR_ACCESS_TOKEN}

<Application>
    <ServiceType>Messaging-V2</ServiceType>
    <AppName>Production Server</AppName>
    <MsgCallbackUrl>https://yourSecureSite.com/callbacks</MsgCallbackUrl>
    <CallbackCreds>
      <UserId>Your-User-id</UserId>
      <Password>Your-Password</Password>
  </CallbackCreds>
</Application>
HTTP/1.1 201 Created
Content-Type: application/xml

<?xml version="1.0" encoding="UTF-8" standalone="yes"?>
<ApplicationProvisioningResponse>
    <Application>
        <ApplicationId>590cde45-c05d-44e3-a77a-59fd10f17c26</ApplicationId>
        <ServiceType>Messaging-V2</ServiceType>
        <AppName>Setup Test</AppName>
        <CallbackUrl>https://yourSecureSite.com/callbacks</CallbackUrl>
        <MsgCallbackUrl>https://yourSecureSite.com/callbacks</MsgCallbackUrl>
        <InboundCallbackUrl>https://yourSecureSite.com/callbacks</InboundCallbackUrl>
        <OutboundCallbackUrl>https://yourSecureSite.com/callbacks</OutboundCallbackUrl>
        <RequestedCallbackTypes>
            <CallbackType>message-sending</CallbackType>
            <CallbackType>message-sent</CallbackType>
            <CallbackType>message-failed</CallbackType>
            <CallbackType>message-delivered</CallbackType>
        </RequestedCallbackTypes>
        <CallbackCreds>
            <UserId>Your-User-id</UserId>
        </CallbackCreds>
        <InboundCallbackCreds>
            <UserId>Your-User-id</UserId>
        </InboundCallbackCreds>
        <OutboundCallbackCreds>
            <UserId>Your-User-id</UserId>
        </OutboundCallbackCreds>
    </Application>
</ApplicationProvisioningResponse>
Assign a Messaging Application to Location
This walks through assigning a messaging application to a location and enabling V2 messaging on that location. An application must be assigned to a location, the application assigned to the location will run on voice and messaging events for the numbers on the location.
Request URL
PUThttps://api.bandwidth.com/api/accounts/{accountId}/sites/{siteId}/sippeers/{sippeerId}/products/messaging/applicationSettings
Request Body Fields
The fields below should be formatted as XML elements and put in the request body as shown in the example below.
| Field | Required | Description |
|---|---|---|
HttpMessagingV2AppId | Yes | The application ID from the application created above |
Example
- Request
- Response
PUT https://api.bandwidth.com/api/accounts/{accountId}/applications HTTP/1.1
Content-Type: application/xml; charset=utf-8
Authorization: Bearer {YOUR_ACCESS_TOKEN}

<ApplicationsSettings>
  <HttpMessagingV2AppId>590cde45-c05d-44e3-a77a-59fd10f17c26</HttpMessagingV2AppId>
</ApplicationsSettings>
HTTP/1.1 200 OK
Content-Type: application/xml

<?xml version="1.0" encoding="UTF-8" standalone="yes"?>
<ApplicationsSettingsResponse>
    <ApplicationsSettings>
        <HttpMessagingV2AppId>590cde45-c05d-44e3-a77a-59fd10f17c26</HttpMessagingV2AppId>
    </ApplicationsSettings>
</ApplicationsSettingsResponse>
Create a Voice Application via the API
This section walks though creating a voice application.
Request URL
POSThttps://api.bandwidth.com/api/accounts/{accountId}/applications
Request Body Fields
The fields below should be formatted as XML elements and put in the request body as shown in the example below.
| Field | Required | Description |
|---|---|---|
ServiceType | Yes | Set to Voice-V2 |
AppName | Yes | Plain text name of the application |
CallInitiatedCallbackUrl | Yes | Url to receive actionable voice events |
CallStatusCallbackUrl | No | Url to receive voice events NOT related to Initiated. Such as: rejected or hung up |
CallbackCreds | No | Basic auth credentials to apply to your voice events |
CallbackCreds.UserId | No | Basic auth UserId |
CallbackCreds.Password | No | Basic auth Password |
Example
- Request
- Response
POST https://api.bandwidth.com/api/accounts/{accountId}/applications HTTP/1.1
Content-Type: application/xml; charset=utf-8
Authorization: Bearer {YOUR_ACCESS_TOKEN}

<Application>
    <ServiceType>Voice-V2</ServiceType>
    <AppName>Setup Test Voice</AppName>
    <CallInitiatedCallbackUrl>https://yourSecureSite.com/callbacks/init</CallInitiatedCallbackUrl>
    <CallStatusCallbackUrl>https://yourSecureSite.com/callbacks/status</CallStatusCallbackUrl>
    <CallbackCreds>
      <UserId>Your-User-id</UserId>
      <Password>Your-Password</Password>
  </CallbackCreds>
</Application>
HTTP/1.1 201 Created
Content-Type: application/xml

<?xml version="1.0" encoding="UTF-8" standalone="yes"?>
<ApplicationProvisioningResponse>
    <Application>
        <ApplicationId>0fff897a-3ee3-4e7e-94d7-89a067cdfe6b</ApplicationId>
        <ServiceType>Voice-V2</ServiceType>
        <AppName>Setup Test Voice</AppName>
        <CallInitiatedCallbackUrl>https://yourSecureSite.com/callbacks/init</CallInitiatedCallbackUrl>
        <CallInitiatedMethod>POST</CallInitiatedMethod>
        <CallStatusCallbackUrl>https://yourSecureSite.com/callbacks/status</CallStatusCallbackUrl>
        <CallStatusMethod>POST</CallStatusMethod>
        <CallbackCreds>
            <UserId>Your-User-id</UserId>
        </CallbackCreds>
    </Application>
</ApplicationProvisioningResponse>
Assign a Voice Application to Location
This walks through assigning a voice application to a location and enabling HTTP Voice on that location. An application must be assigned to a location, the application assigned to the location will run on voice and messaging events for the numbers on the location.
Request URL
POSThttps://api.bandwidth.com/api/accounts/{accountId}/sites/{siteId}/sippeers/{sippeerId}/products/origination/settings
Request Body Fields
The fields below should be formatted as XML elements and put in the request body as shown in the example below.
| Field | Required | Description |
|---|---|---|
VoiceProtocol | Yes | MUST BE SET TO HTTP |
HttpSettings | Yes | Parent element for HTTP settings |
HttpVoiceV2AppId | Yes | The applicationId of the Voice application created above |
Example
- Request
- Response
POST https://api.bandwidth.com/api/accounts/{accountId}/sites/{siteId}/sippeers/{sippeerId}/products/origination/settings HTTP/1.1
Content-Type: application/xml; charset=utf-8
Authorization: Bearer {YOUR_ACCESS_TOKEN}

<SipPeerOriginationSettings>
  <VoiceProtocol>HTTP</VoiceProtocol>
  <HttpSettings>
    <HttpVoiceV2AppId>{voice-applicationId}</HttpVoiceV2AppId>
  </HttpSettings>
</SipPeerOriginationSettings>
HTTP/1.1 200 OK
Content-Type: application/xml

<?xml version="1.0" encoding="UTF-8" standalone="yes"?>
<SipPeerOriginationSettingsResponse>
    <SipPeerOriginationSettings>
        <VoiceProtocol>HTTP</VoiceProtocol>
        <HttpSettings>
            <HttpVoiceV2AppId>0fff897a-3ee3-4e7e-94d7-89a067cdfe6b</HttpVoiceV2AppId>
        </HttpSettings>
    </SipPeerOriginationSettings>
</SipPeerOriginationSettingsResponse>
Order a Phone Number
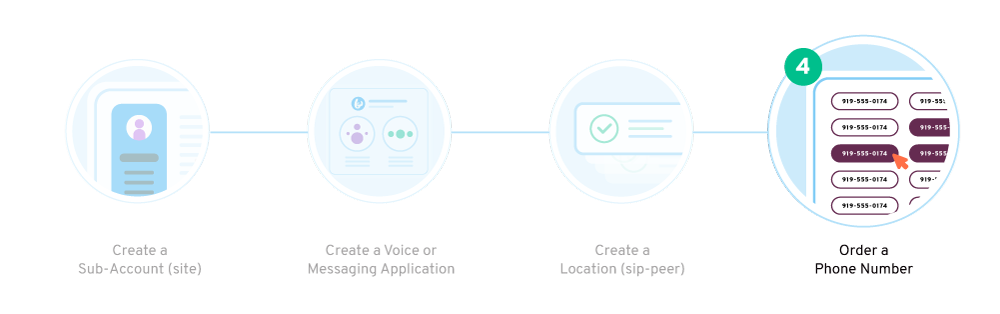
Now that your Account is set up, you're ready to order a phone number and begin communicating with Bandwidth! This step is the same whether you set up your account through the Bandwidth App or the API above.
For a guide on ordering phone numbers in the Bandwidth App, click here!
For a guide on ordering phone numbers via the Bandwidth API, click here!
Next steps
Set up your API Credentials
Create your API Credentials to validate your API calls.
Start Developing to Our Voice and Messaging APIs
After you've completed your account set-up tasks, you are ready to send your first text message or create your first phone call. For help, check out our SDK's and Postman Collection.