ZenDesk Integration
This guide will walk you through integrating Bandwidth Messaging with ZenDesk. This integration will allow you to send messages from your ServiceNow instance using Bandwidth's Messaging API.
Prerequisites
Before you can integrate Bandwidth Messaging with ZenDesk, you will need to ensure the following:
- You have a Bandwidth account enabled for programmable messaging. If you are unsure, please reach out to your account manager or Bandwidth Support.
- You have created API credentials for use with the Bandwidth APIs.Please refer to the credentials documentation for more information.
- You have provisioned your account with a Sub-Account (Site), Location (Sip-Peer), and Messaging Application. If you are unfamiliar/unsure, please refer to the following documentation:
- You have purchased a phone number for use with Bandwidth Messaging. If you have not, please refer to the phone number purchasing documentation for more information.
- You have associated your number with a Campaign. For more information on Campaigns, please refer to the Campaigns documentation.
Integration Steps
ZenDesk offers a thorough guide on integrating with a 3rd party webhook - which is essentially what this guide will walk you through. You can find their guide here.
Create a Webhook
- In the ZenDesk Admin Center, under
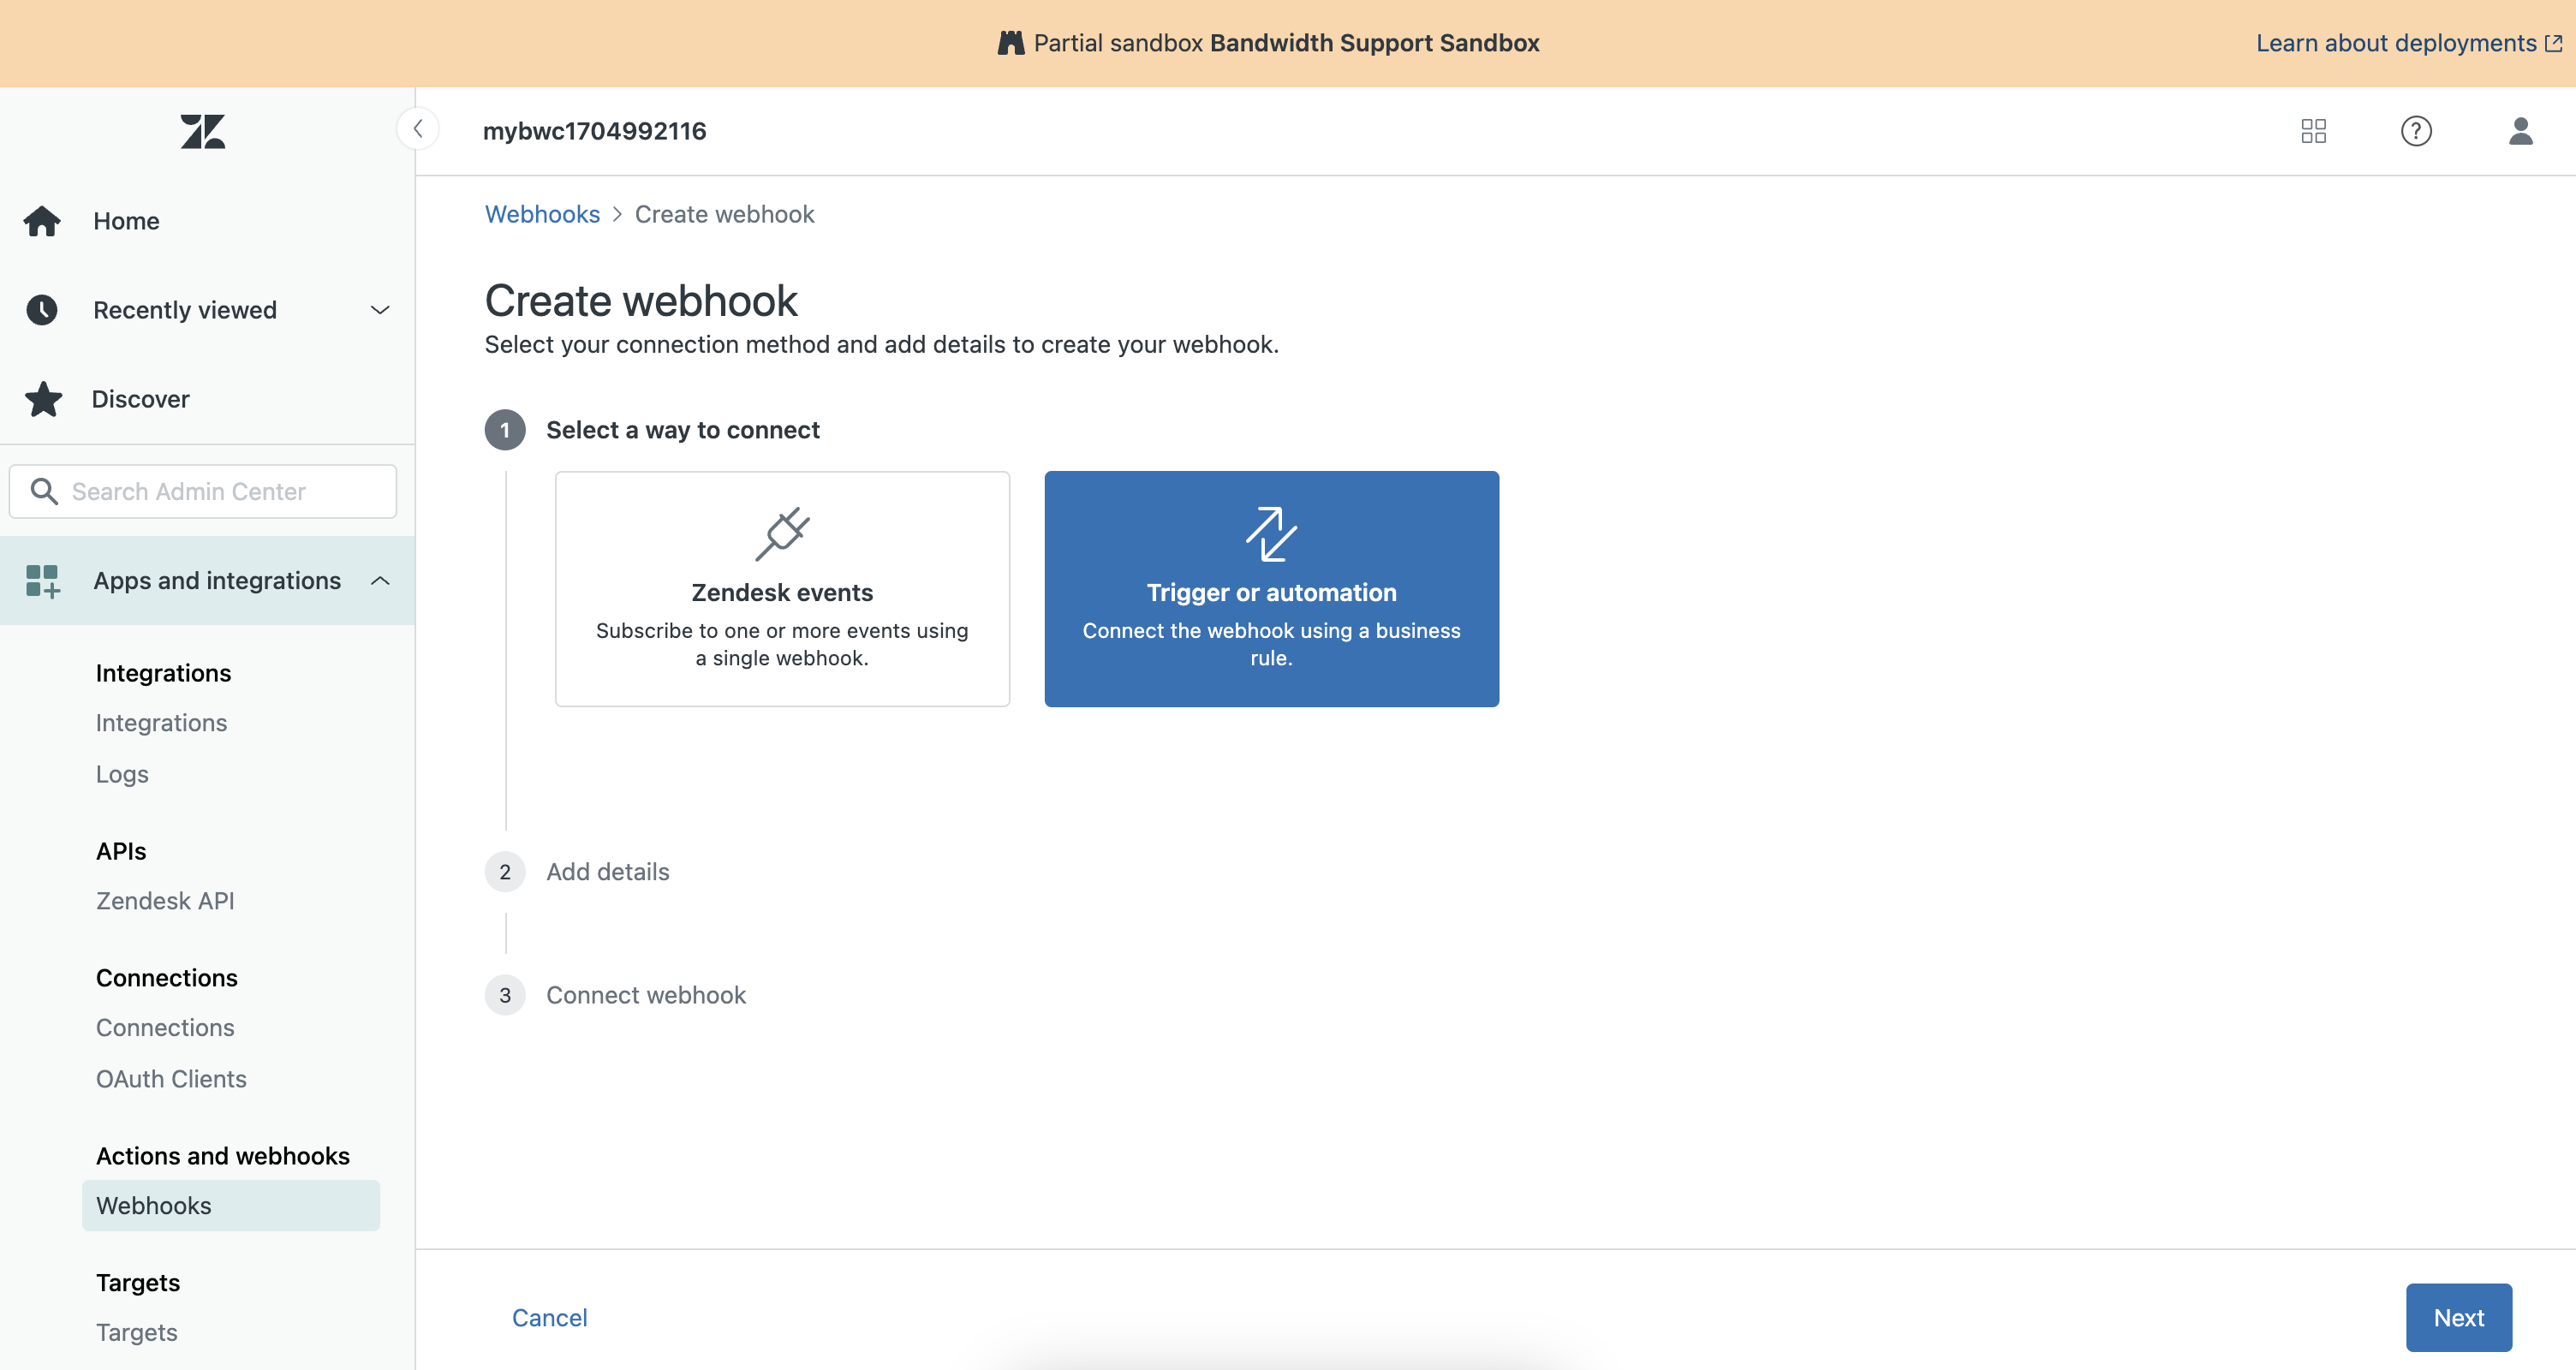
Apps and Integrations, select Actions and Webhooks and create a new Webhook based on a trigger.

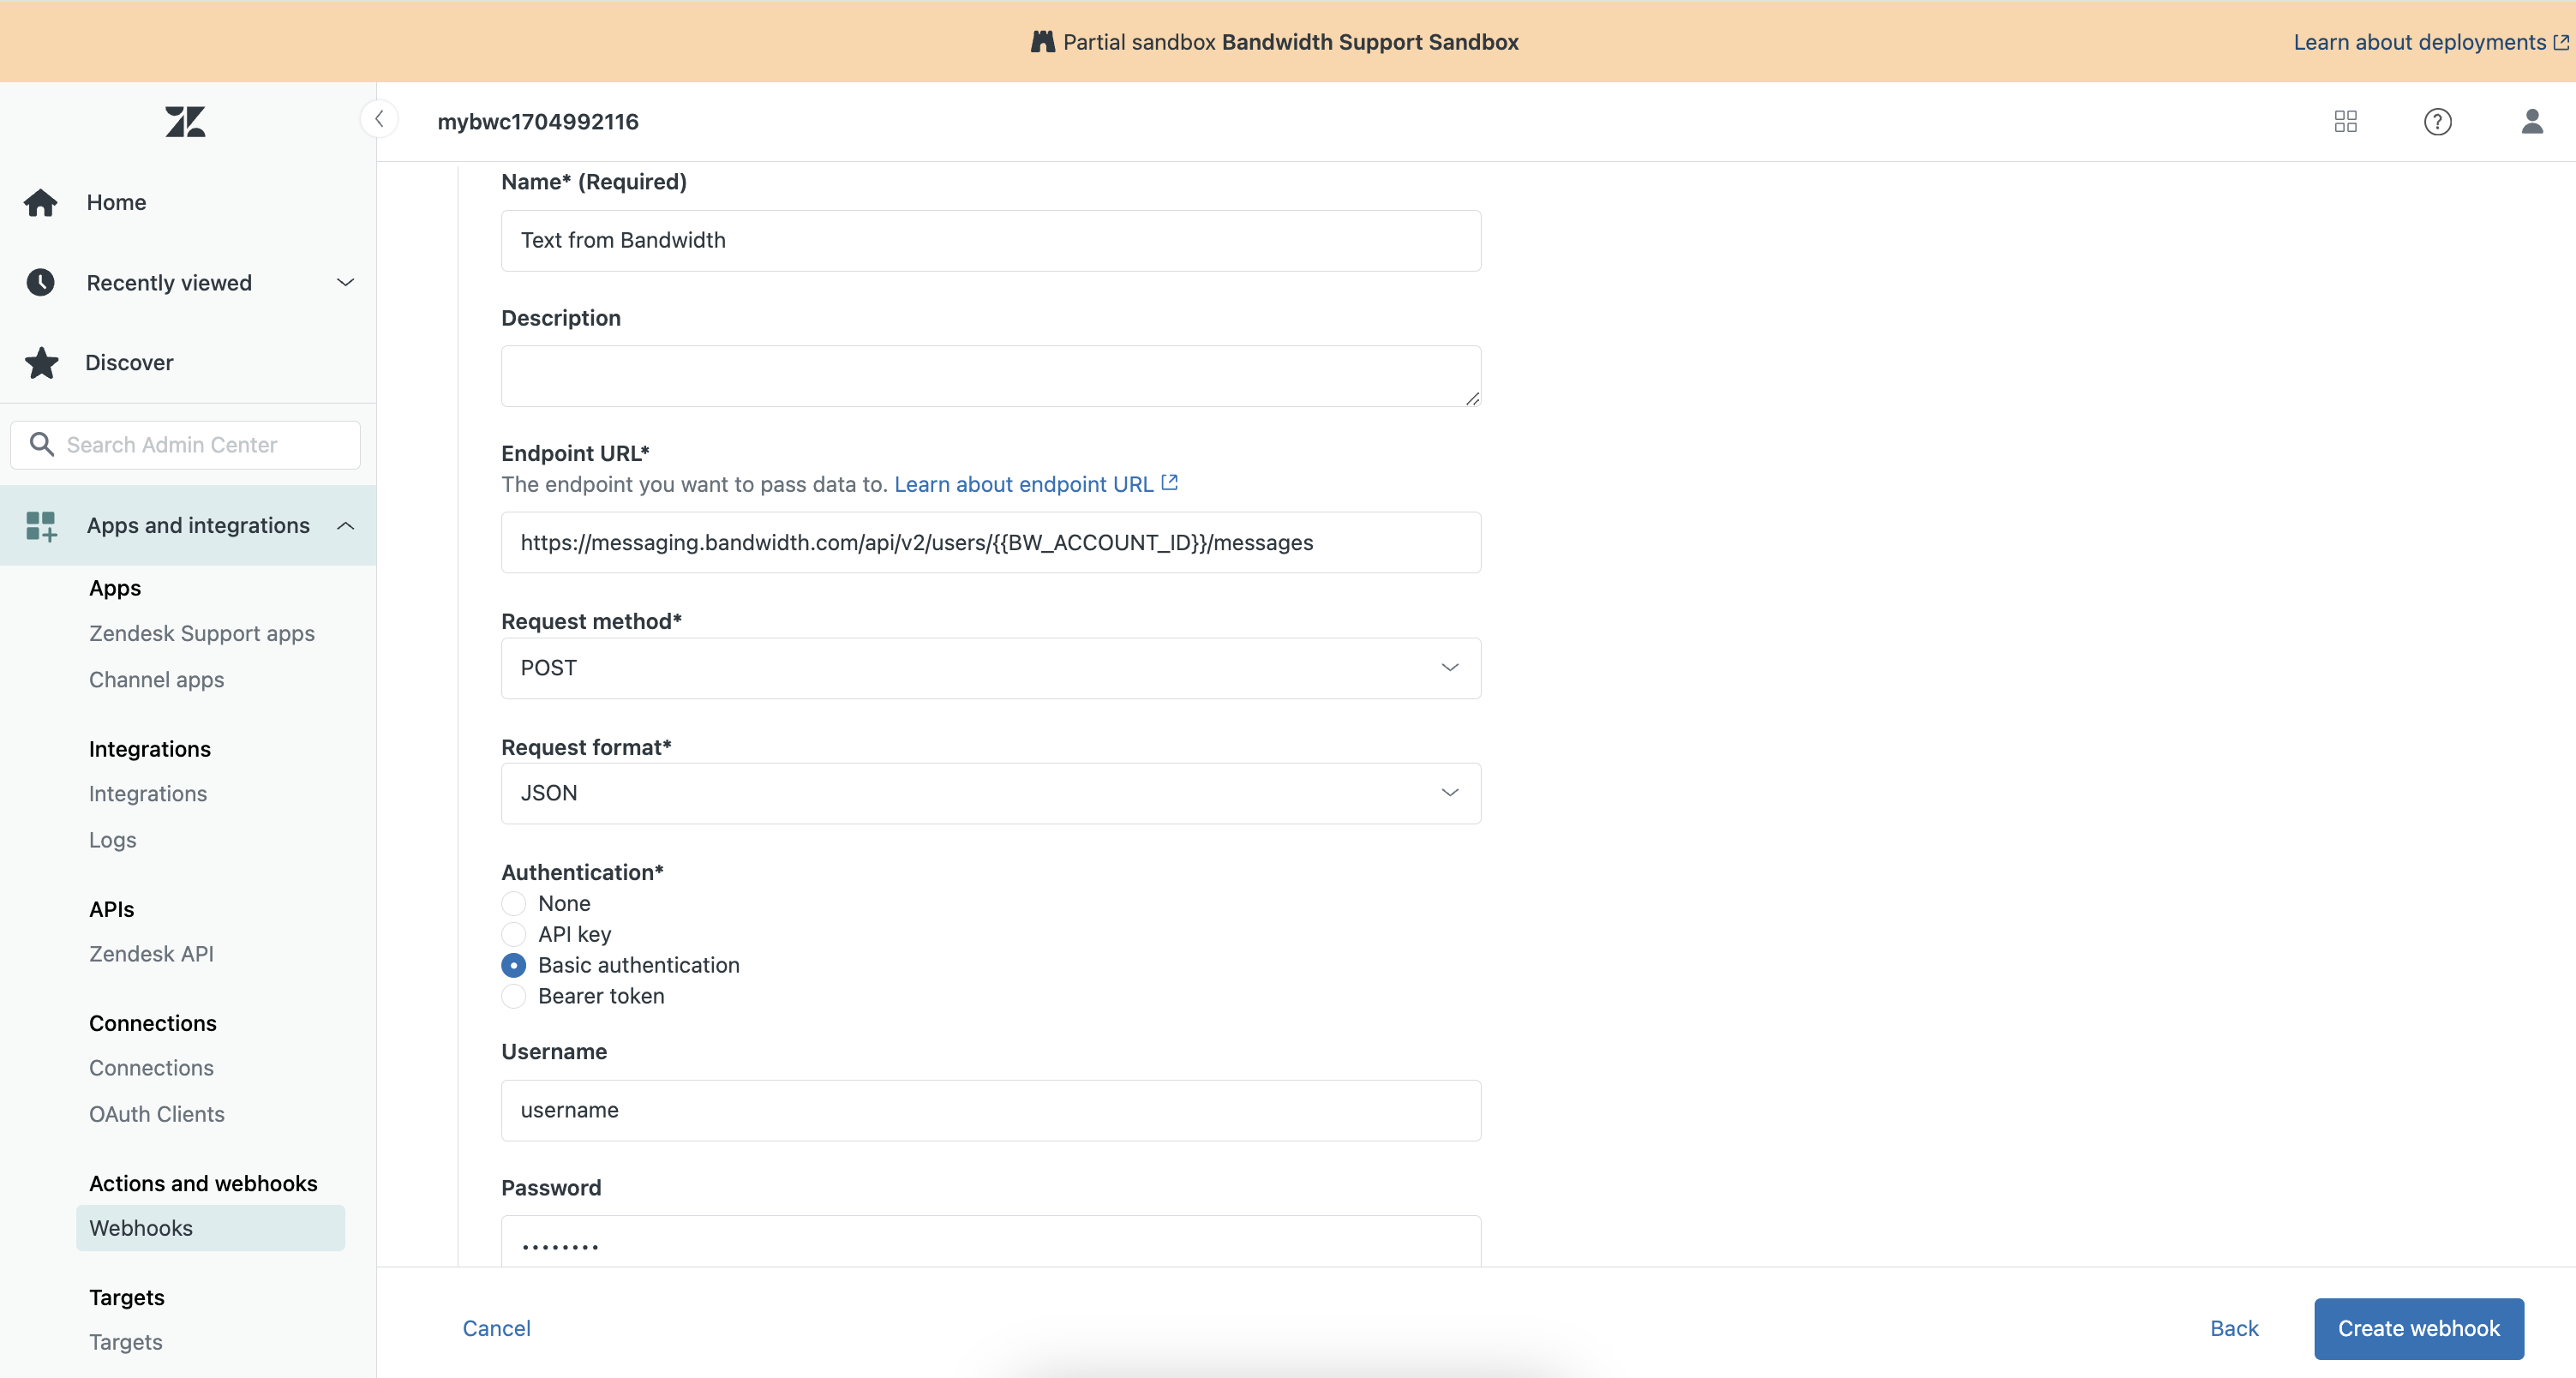
- Set the endpoint URL to
https://messaging.bandwidth.com/api/v2/users/{{BW_ACCOUNT_ID}}/messageswhere{{BW_ACCOUNT_ID}}is your Bandwidth Account ID. - Set the request method to
POST. - Set the request format to
JSON. - Set the authentication type to
Basic authentication. - Enter your Bandwidth API username and password.

Create a Trigger
- In the ZenDesk Admin Center, under
Objects and rules, select Triggers. - Create a new trigger based on the event you want to trigger the webhook.
- Add an action to the trigger that sends a webhook.
- Select the webhook you created in the previous step.
- Fill out the JSON body with the following:
{
    "applicationId": "{{BW_APPLICATION_ID}}",
    "from": "{{BW_PHONE_NUMBER}}",
    "to": ["1+{{ticket.ticket_fiield_<field id number>}}"],
    "text": "Ticket {{ticket.id}} has been created. Please check the status. Thanks - Bandwidth"
}- Be sure to replace
{{BW_APPLICATION_ID}}with your Bandwidth Application ID. - Be sure to replace
{{BW_PHONE_NUMBER}}with your Bandwidth Phone Number. This is the number the SMS messages will be deliveredfrom. - You can configure the
textfield to your liking. This is the message that will be sent to thetonumber. In this example, we configured a customtonumber field for each ticket in ZenDesk, you will need to create a custom field and reference that here.
- Be sure to replace
- Submit the Webhook.
With your webhook activated, you should now be able to send SMS messages from your ZenDesk instance using Bandwidth's Messaging API.