ServiceNow Integration
This guide will walk you through integrating Bandwidth Messaging with ServiceNow. This integration will allow you to send messages from your ServiceNow instance using Bandwidth's Messaging API.
Prerequisites
Before you can integrate Bandwidth Messaging with ServiceNow, you will need to ensure the following:
- You have a Bandwidth account enabled for programmable messaging. If you are unsure, please reach out to your account manager or Bandwidth Support.
- You have created API credentials for use with the Bandwidth APIs. Please refer to the credentials documentation for more information.
- You have provisioned your account with a Sub-Account (Site), Location (Sip-Peer), and Messaging Application. If you are unfamiliar/unsure, please refer to the following documentation:
- You have purchased a phone number for use with Bandwidth Messaging. If you have not, please refer to the phone number purchasing documentation for more information.
- You have associated your number with a Campaign. For more information on Campaigns, please refer to the Campaigns documentation.
- You have defined a
Credential Aliaswithin your ServiceNow instance. This alias will be used to store your Bandwidth API credentials. For more information on creating aCredential Alias, please refer to the ServiceNow documentation.
Integration Steps
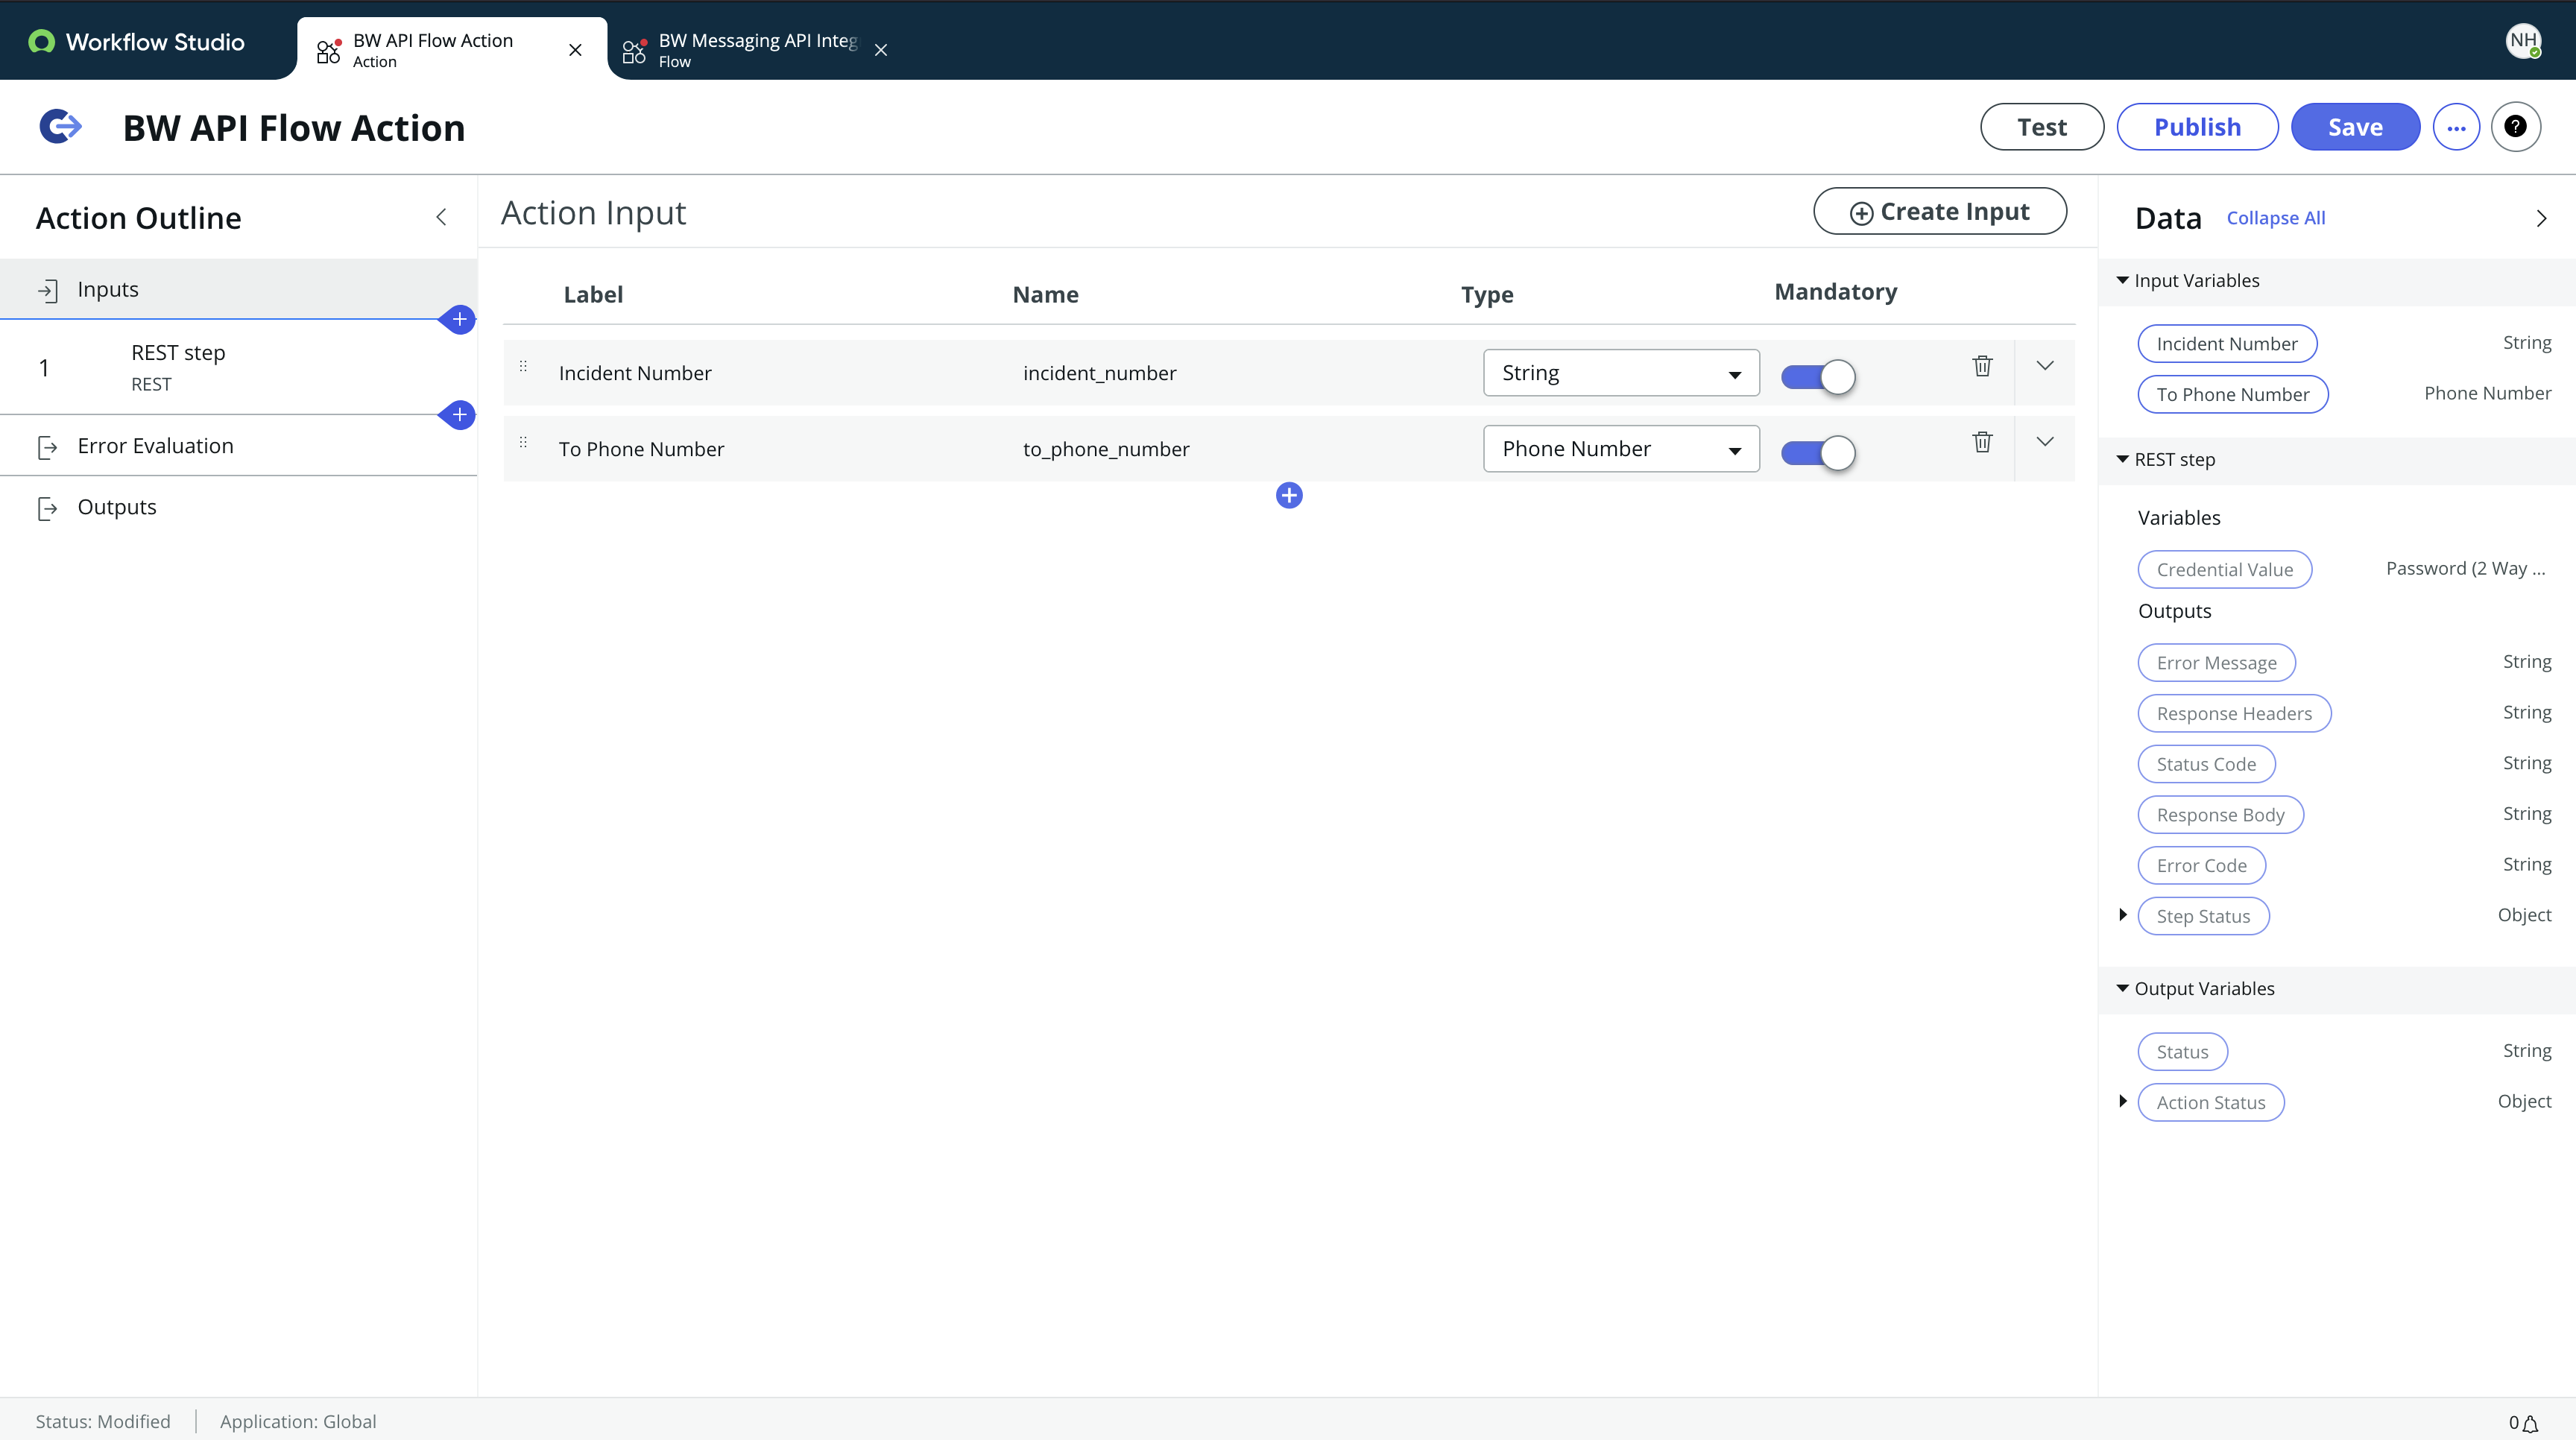
Create Action and Define Inputs
- From the Flow Designer page, click
Newand selectActionfrom the drop-down menu. - Now we want to add Inputs for our new action. In our case, we want to create an input for the Incident Number and
tonumber. Click the+icon to add a new input.- For the Incident Number, set the
TypetoStringand theNametoincident_number. - For the
tonumber, set theTypetoPhone Numberand theNametoto_phone_number. - Be sure to toggle both as Mandatory.
- For the Incident Number, set the
Configure a REST Step
Next we want to add and configure a new step. Click the plus to do so.
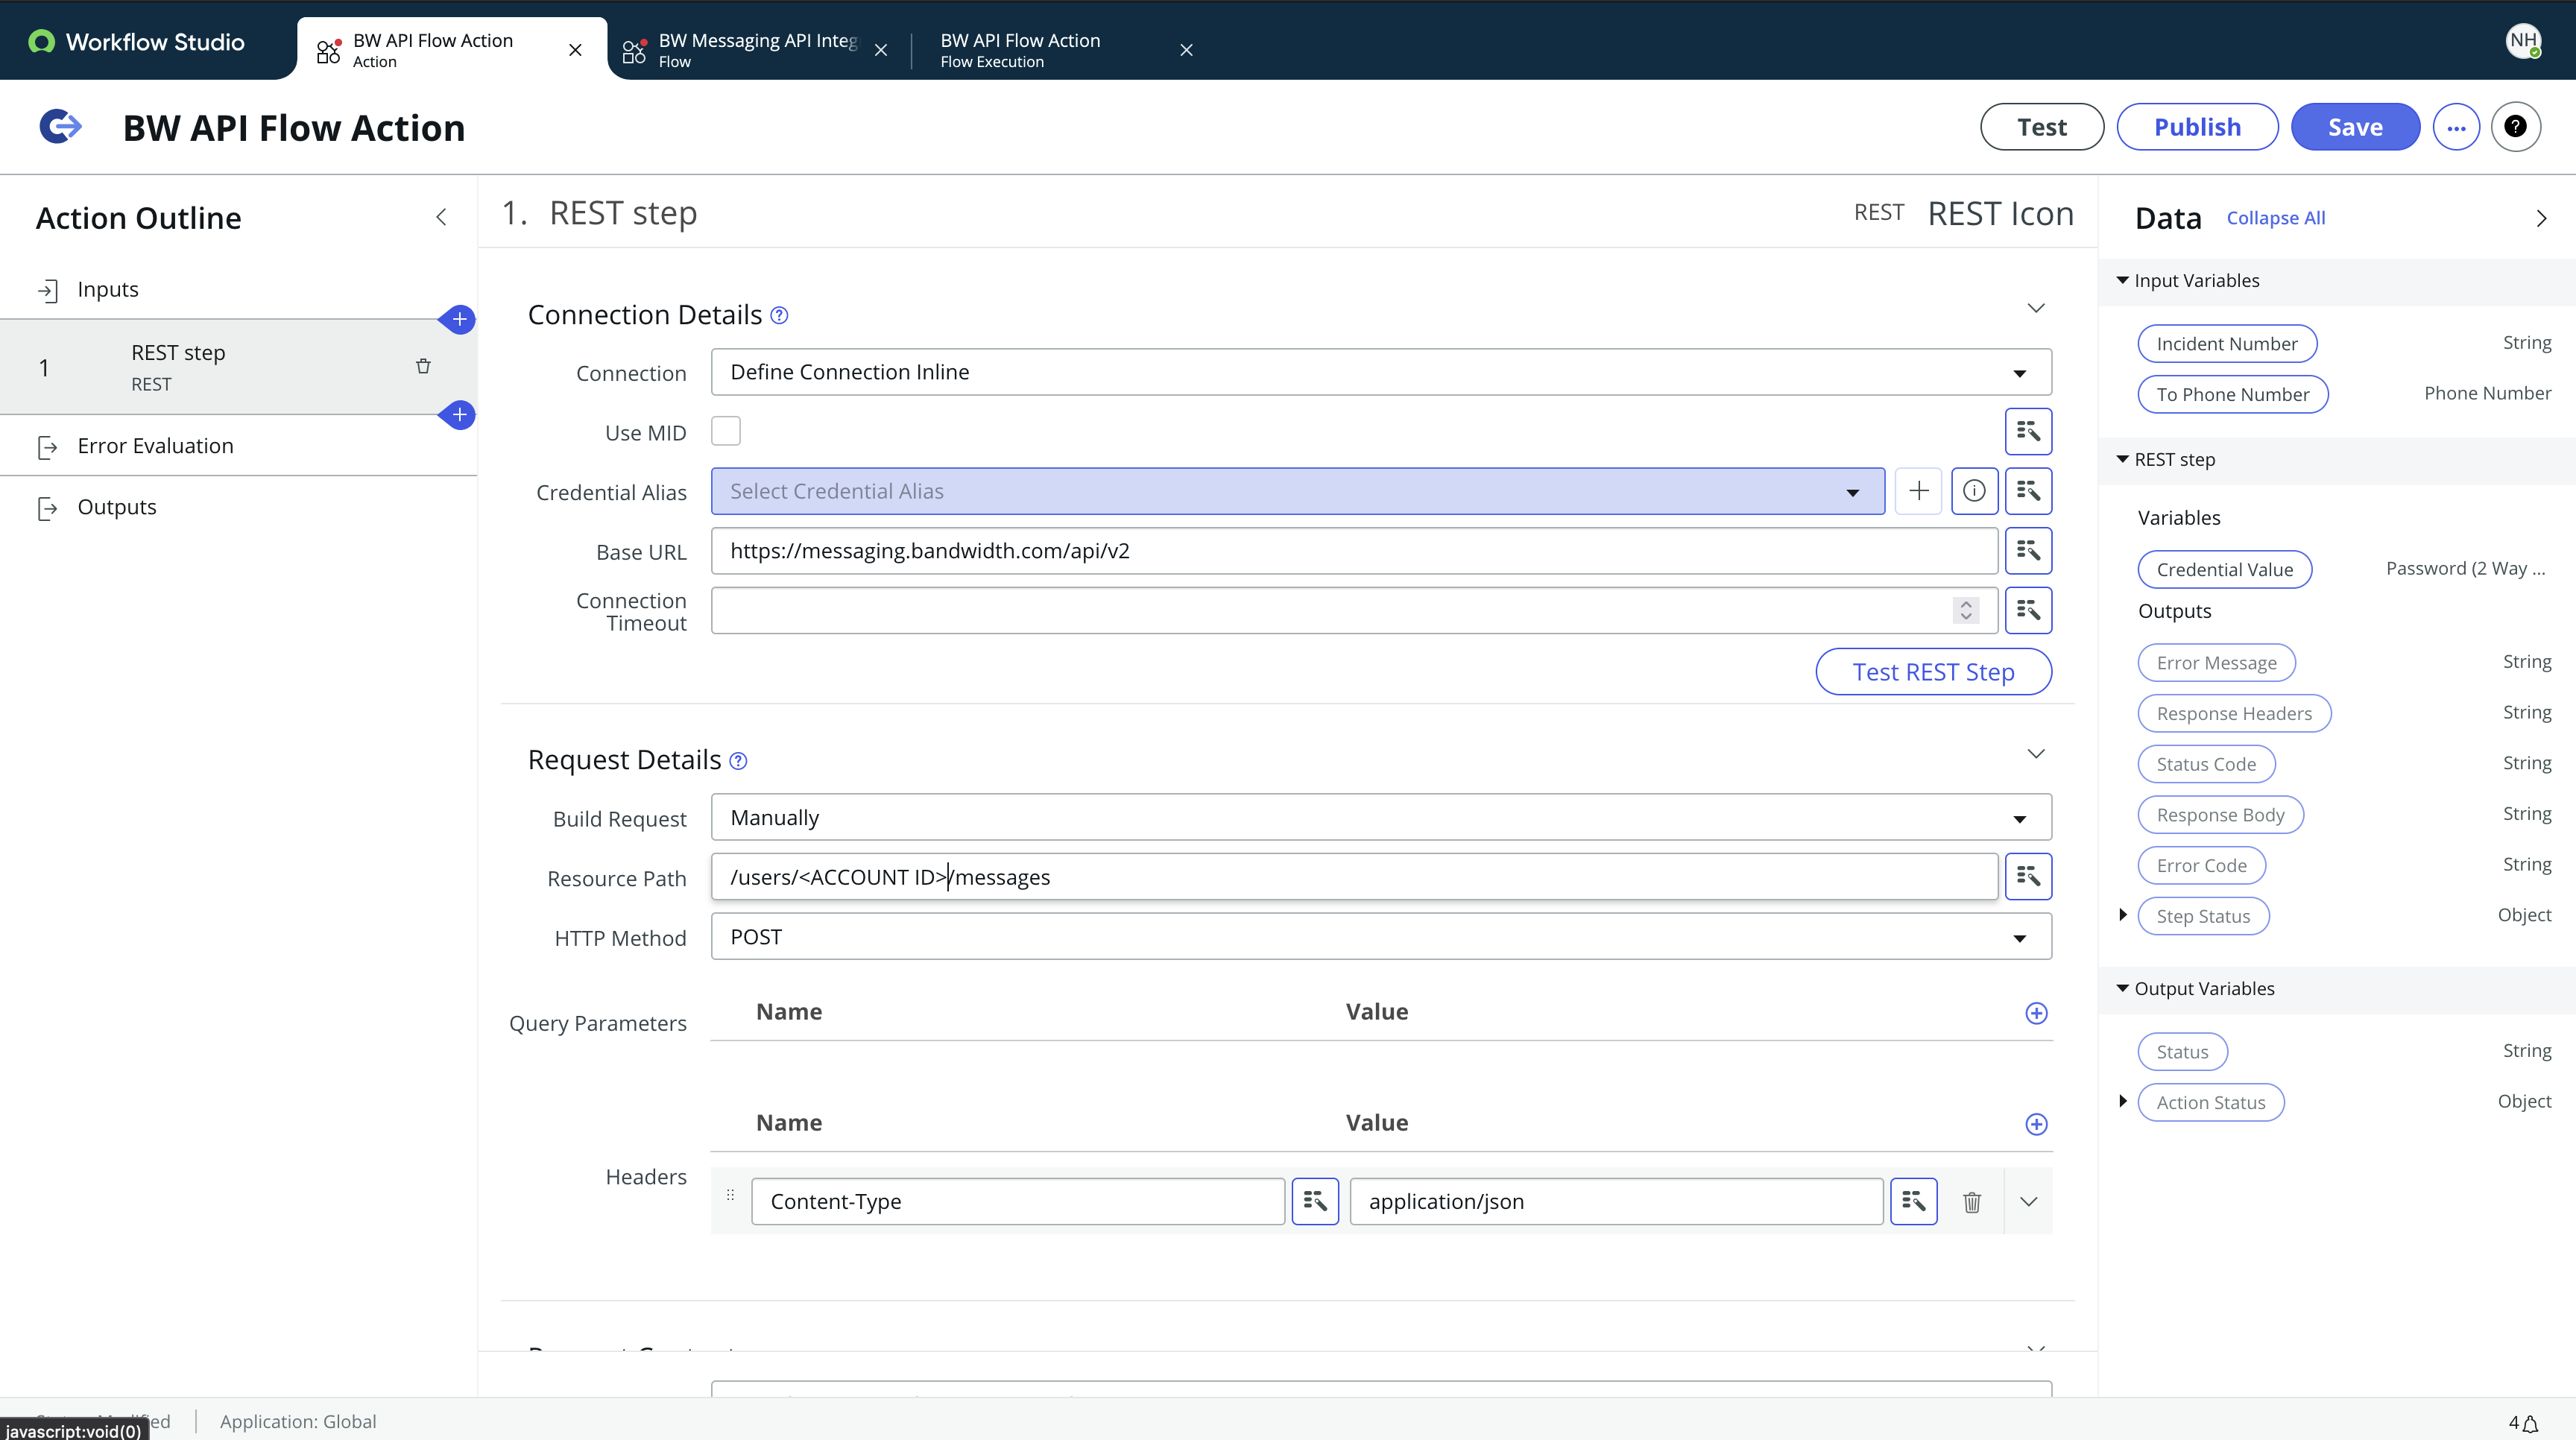
- Select
RESTfrom the list of options. - The
Connectionfield should be set toDefine Connection Inline - You will need a predefined Credentials Alias for authorizing request.
- This
Credentials Aliasmust be Basic Auth with the Username and Password to authenticate to the Bandwidth API.
- This
Base URLshould behttps://messaging.bandwidth.com/api/v2- Make sure
Build Requestis set toManually Resource Pathshould be set to/users/<ACCOUNT_ID>/messages- Be sure to replace
<ACCOUNT_ID>with your Account ID
- Be sure to replace
- Set the
HTTP MethodtoPOST - We will need to add a
Content-TypeHeader, and set the value toapplication/json
Now we need to build the REST body with the Inputs we defined earlier.
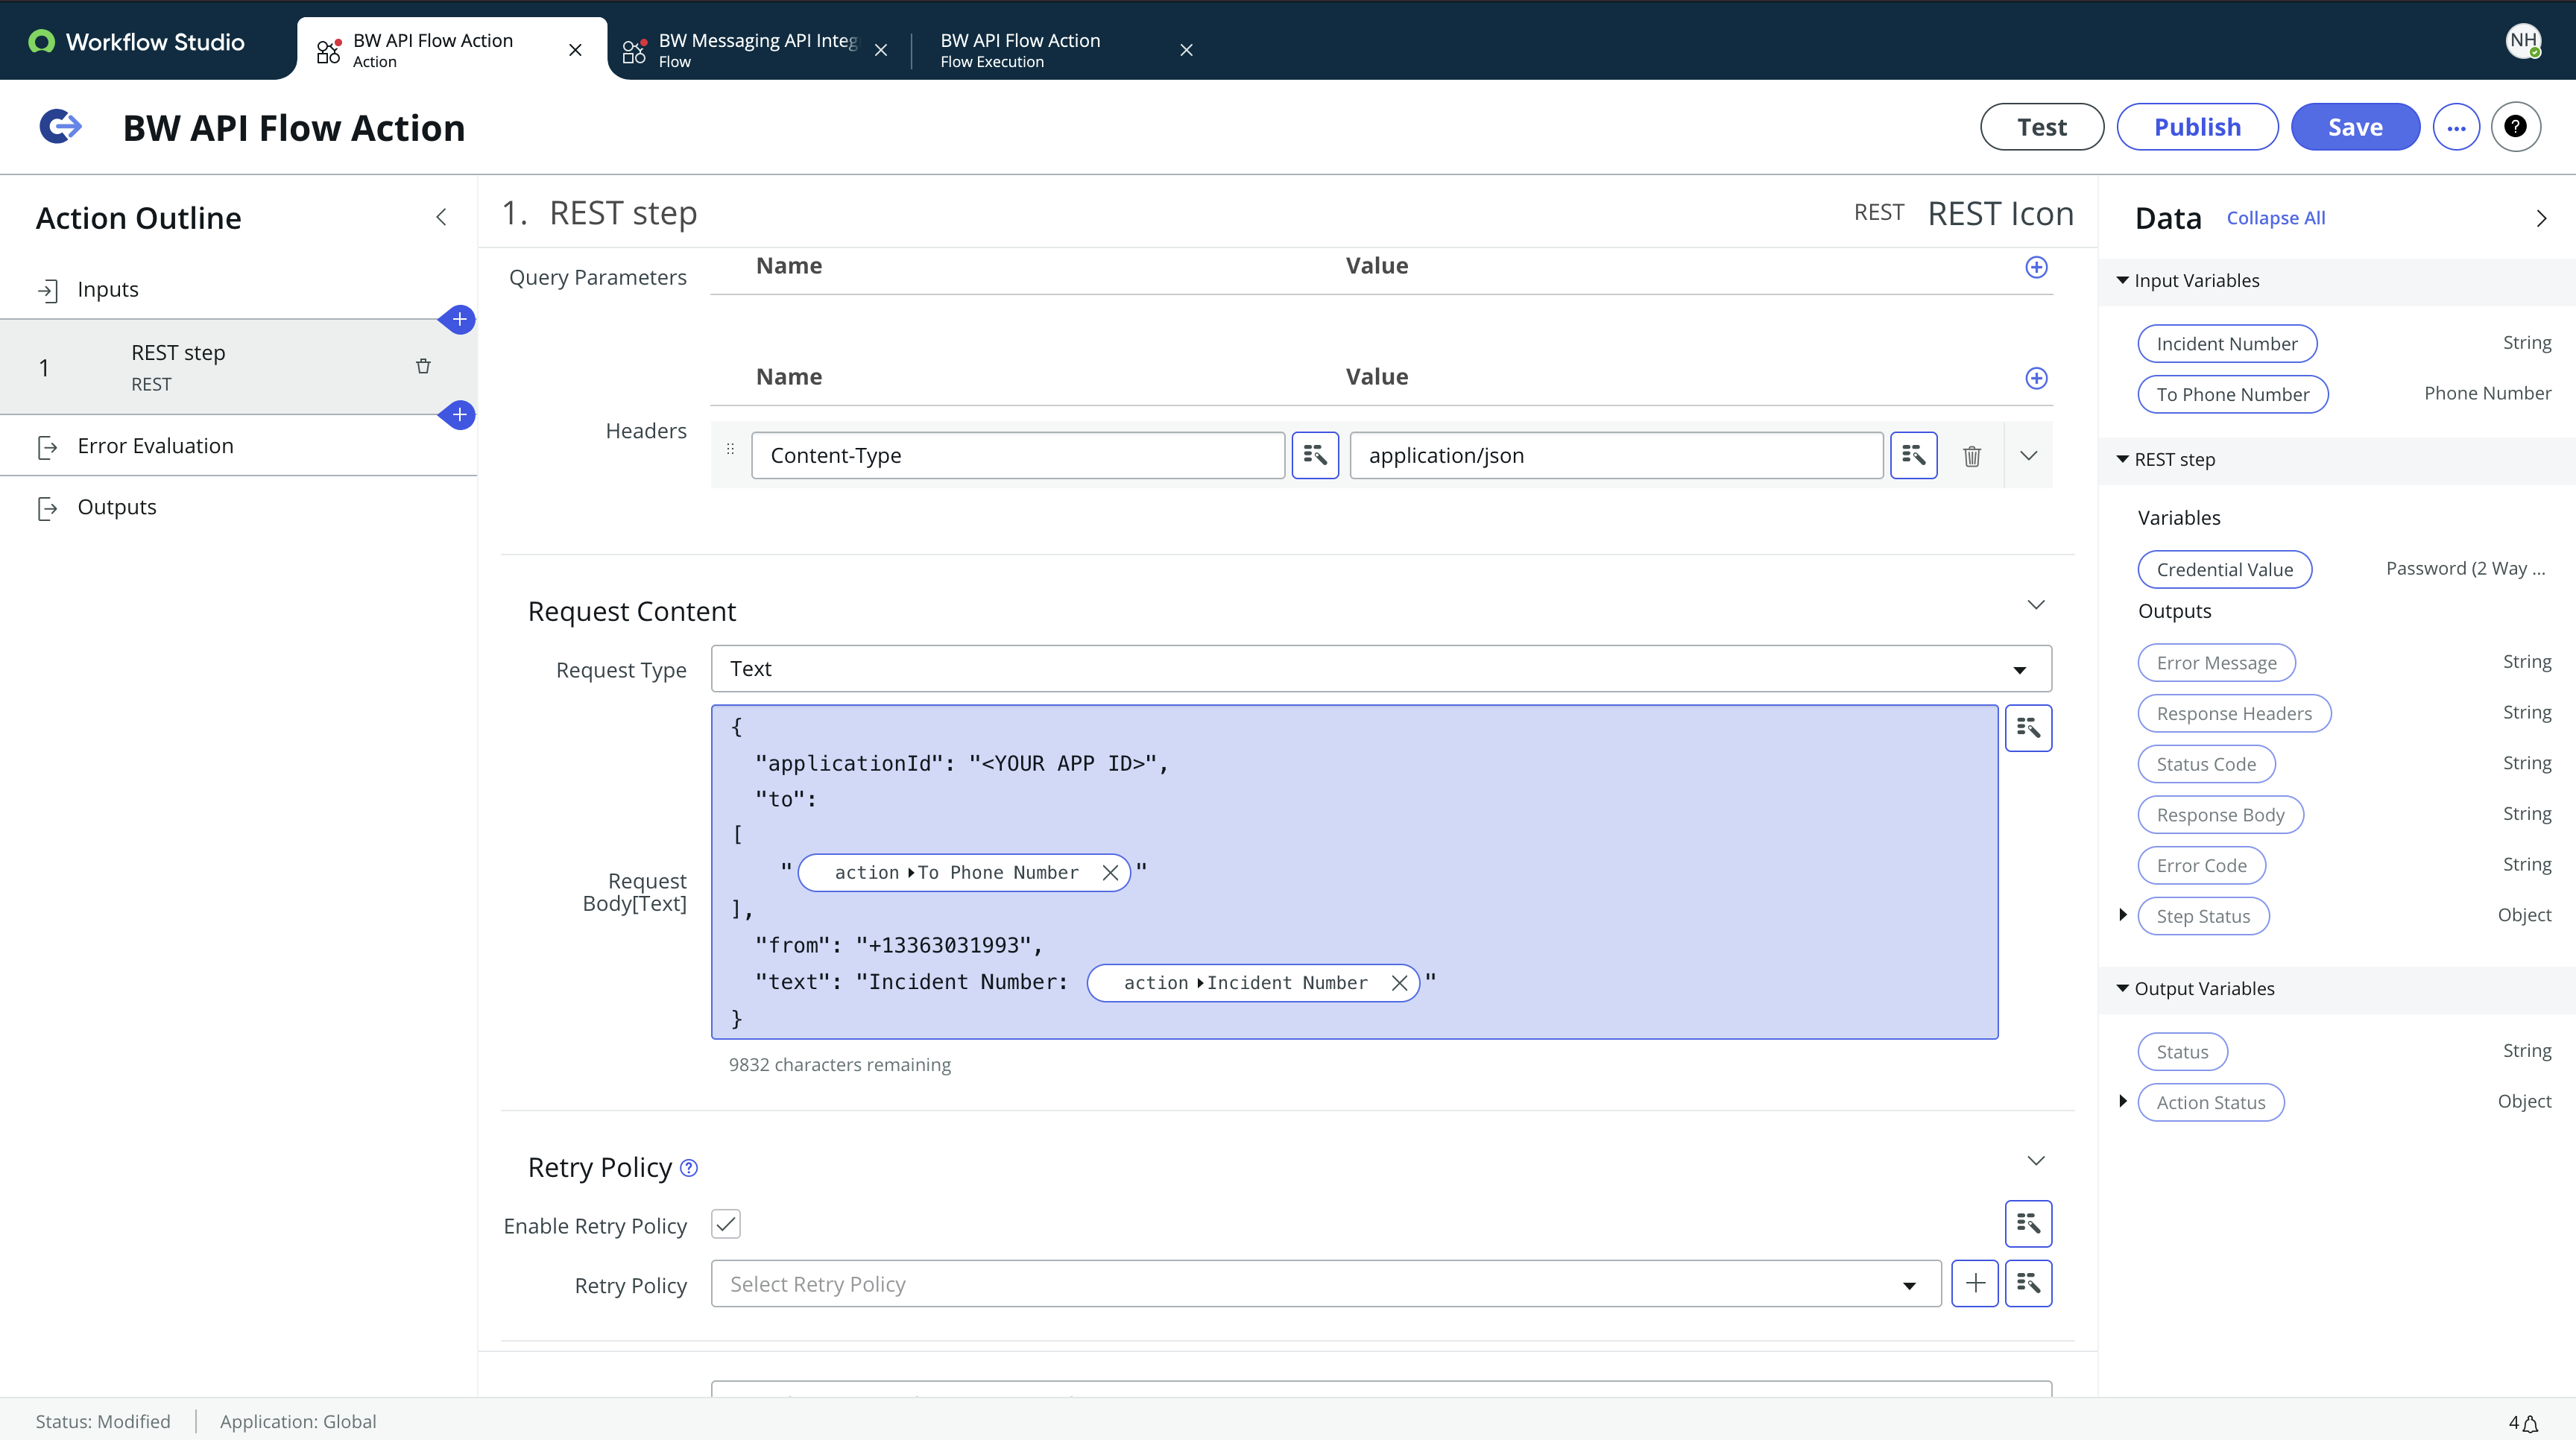
- Under Request Content, the type should be set to
Text - Your Request body should look like the following:
{
    "applicationId": "<BW_APPLICATION_ID>",
    "to": "{{input.to_phone_number}}",
    "from": "<BW_PHONE_NUMBER>",
    "text": "An incident has been created. Please reference Incident # {{input.incident_number}}."
}- Be sure to replace
<BW_APPLICATION_ID>with your Bandwidth Application ID. - Be sure to replace
<BW_PHONE_NUMBER>with your Bandwidth Phone Number. This is the number the SMS messages will be deliveredfrom. - You can configure the
textfield to your liking. This is the message that will be sent to thetonumber. - You may need to use the
magic wandto set the input values fortoandtext.
- Be sure to replace
- If you have specific retry logic, under
Retry Policyyou canEnable Retry Policy. More information on Retry Policies can be found here.
Be sure to save your action.
Create a Trigger
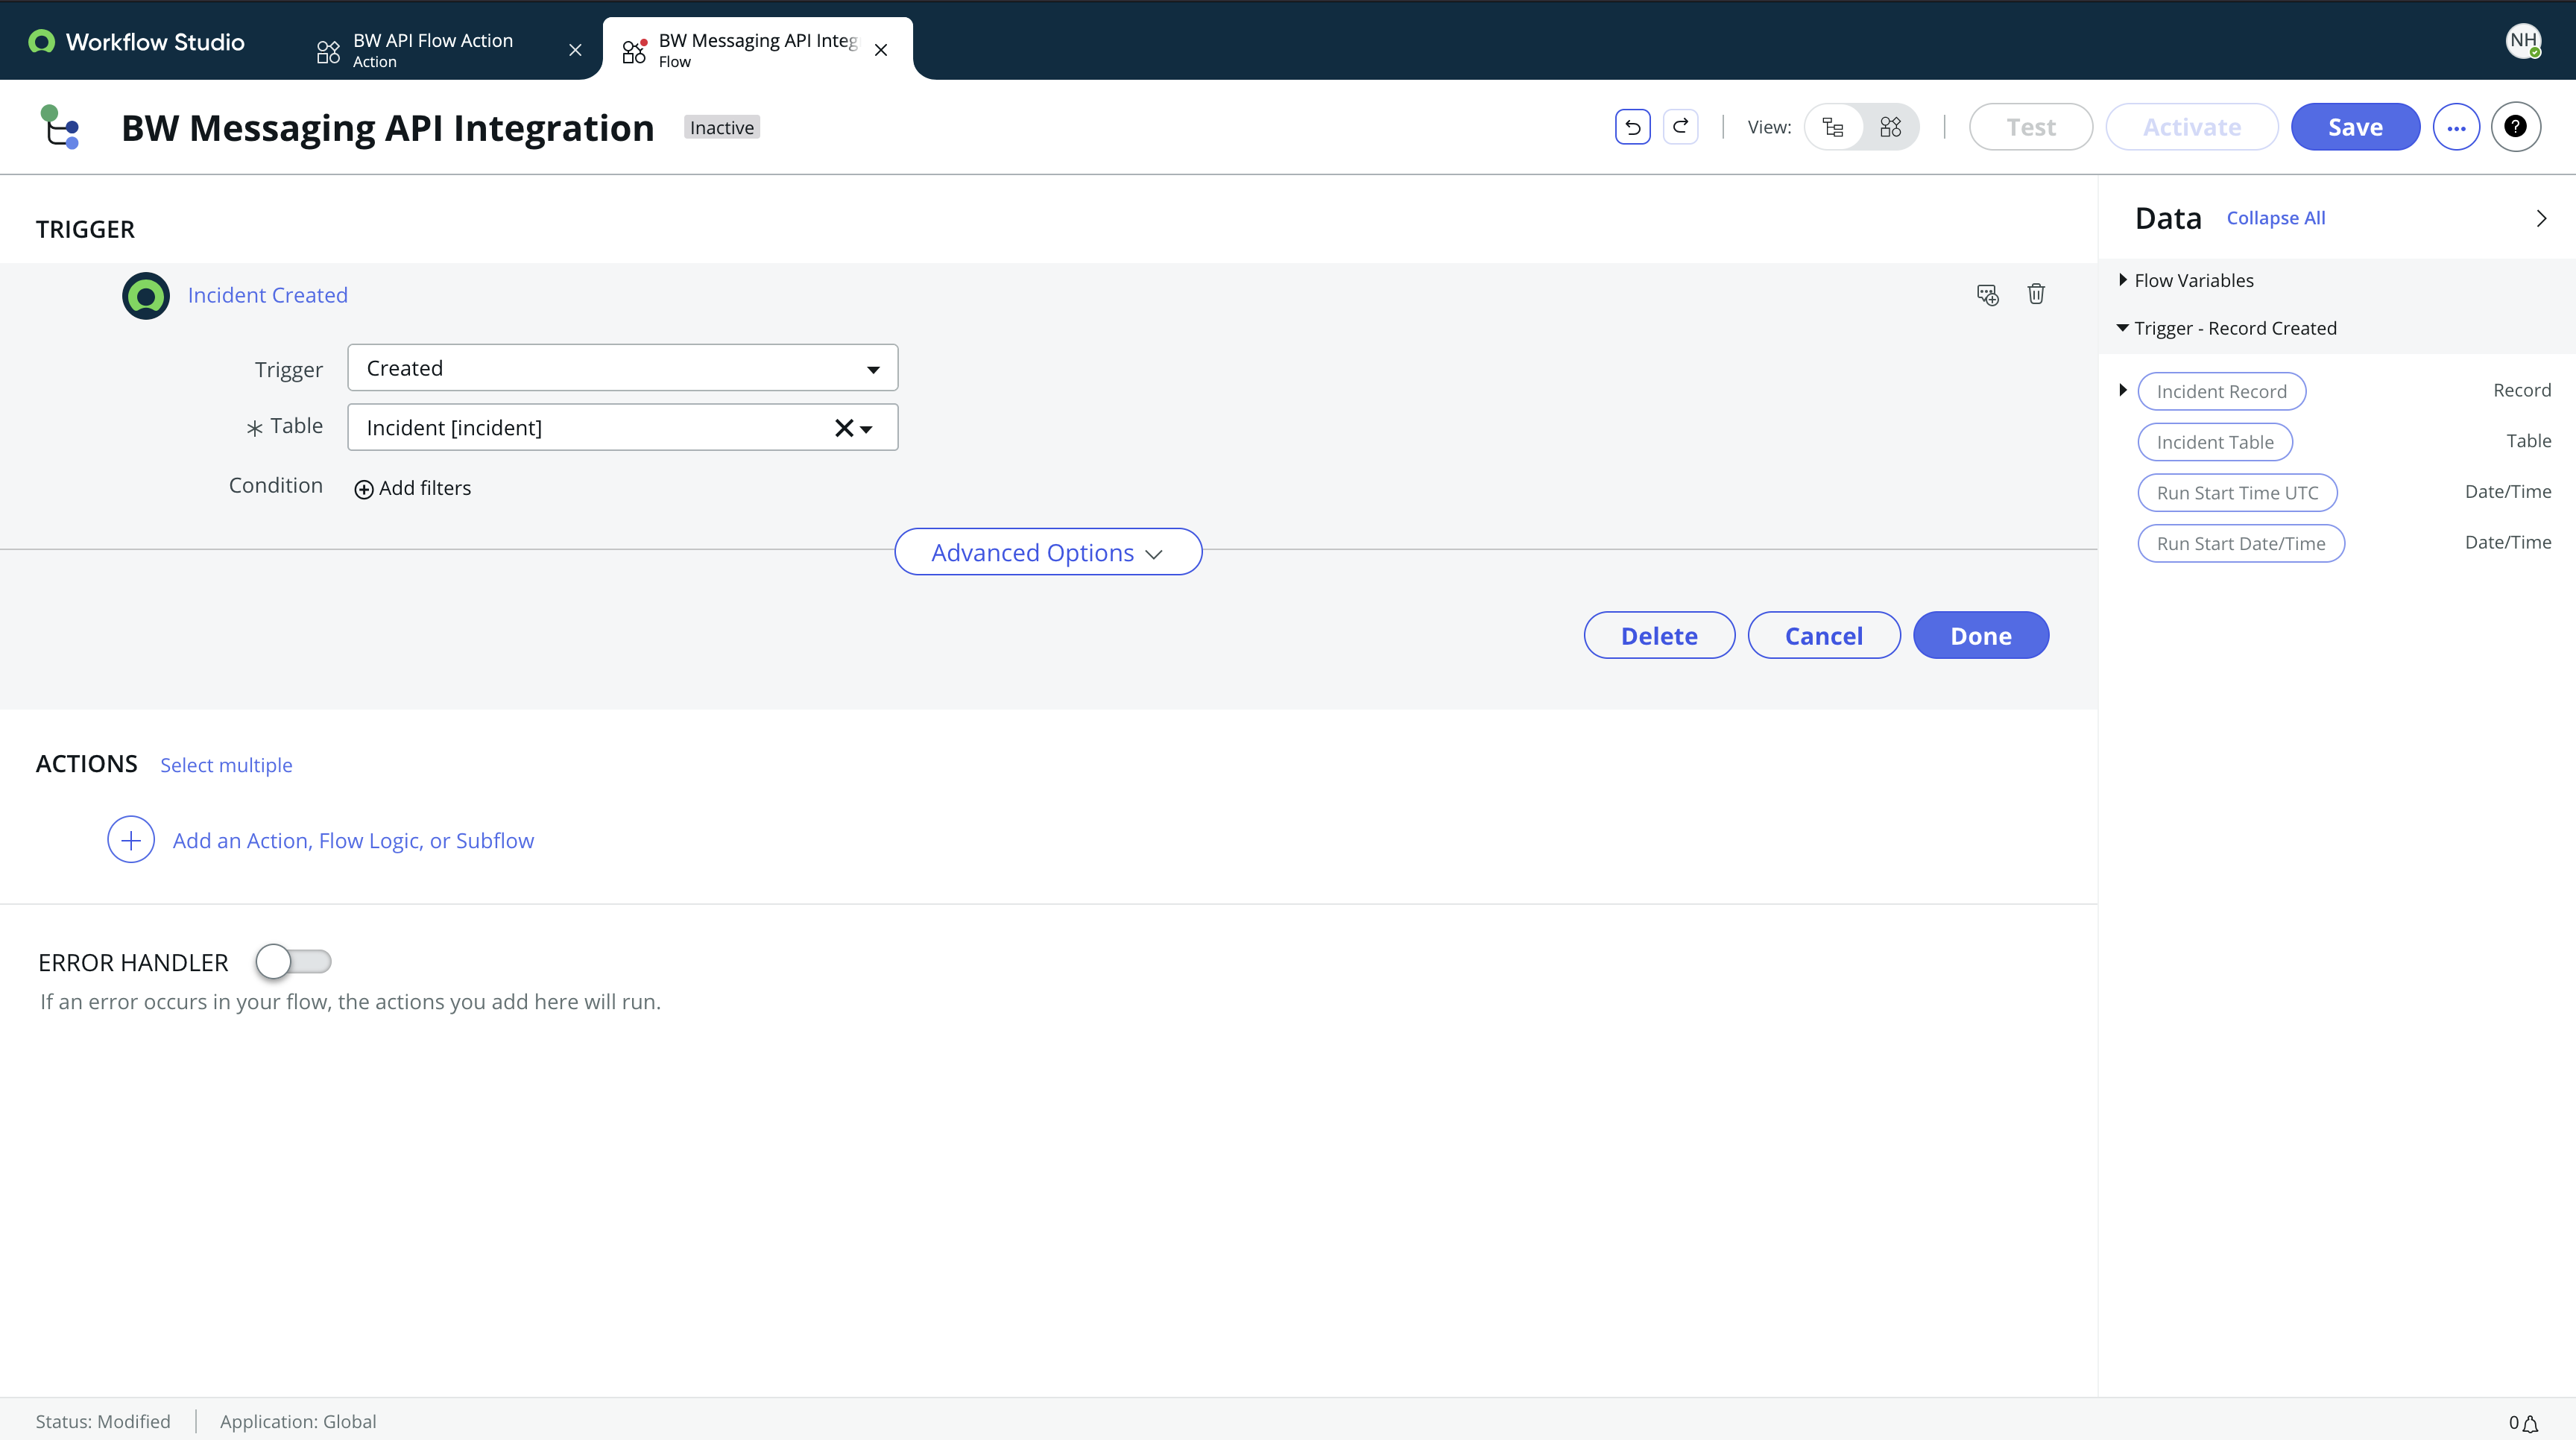
With our Action created, we can set up a trigger to run the action when new incidents are created.
- Create a flow with a trigger. More details on creating a trigger can be found here.
- We want our trigger to run when an incident is created - so our trigger will be
Incident Createdin the search.
- Add an
Actionto the trigger - the Action we created earlier. - Define the action inputs. You will need to map the
Incident Numberandtonumber to the inputs we defined earlier.
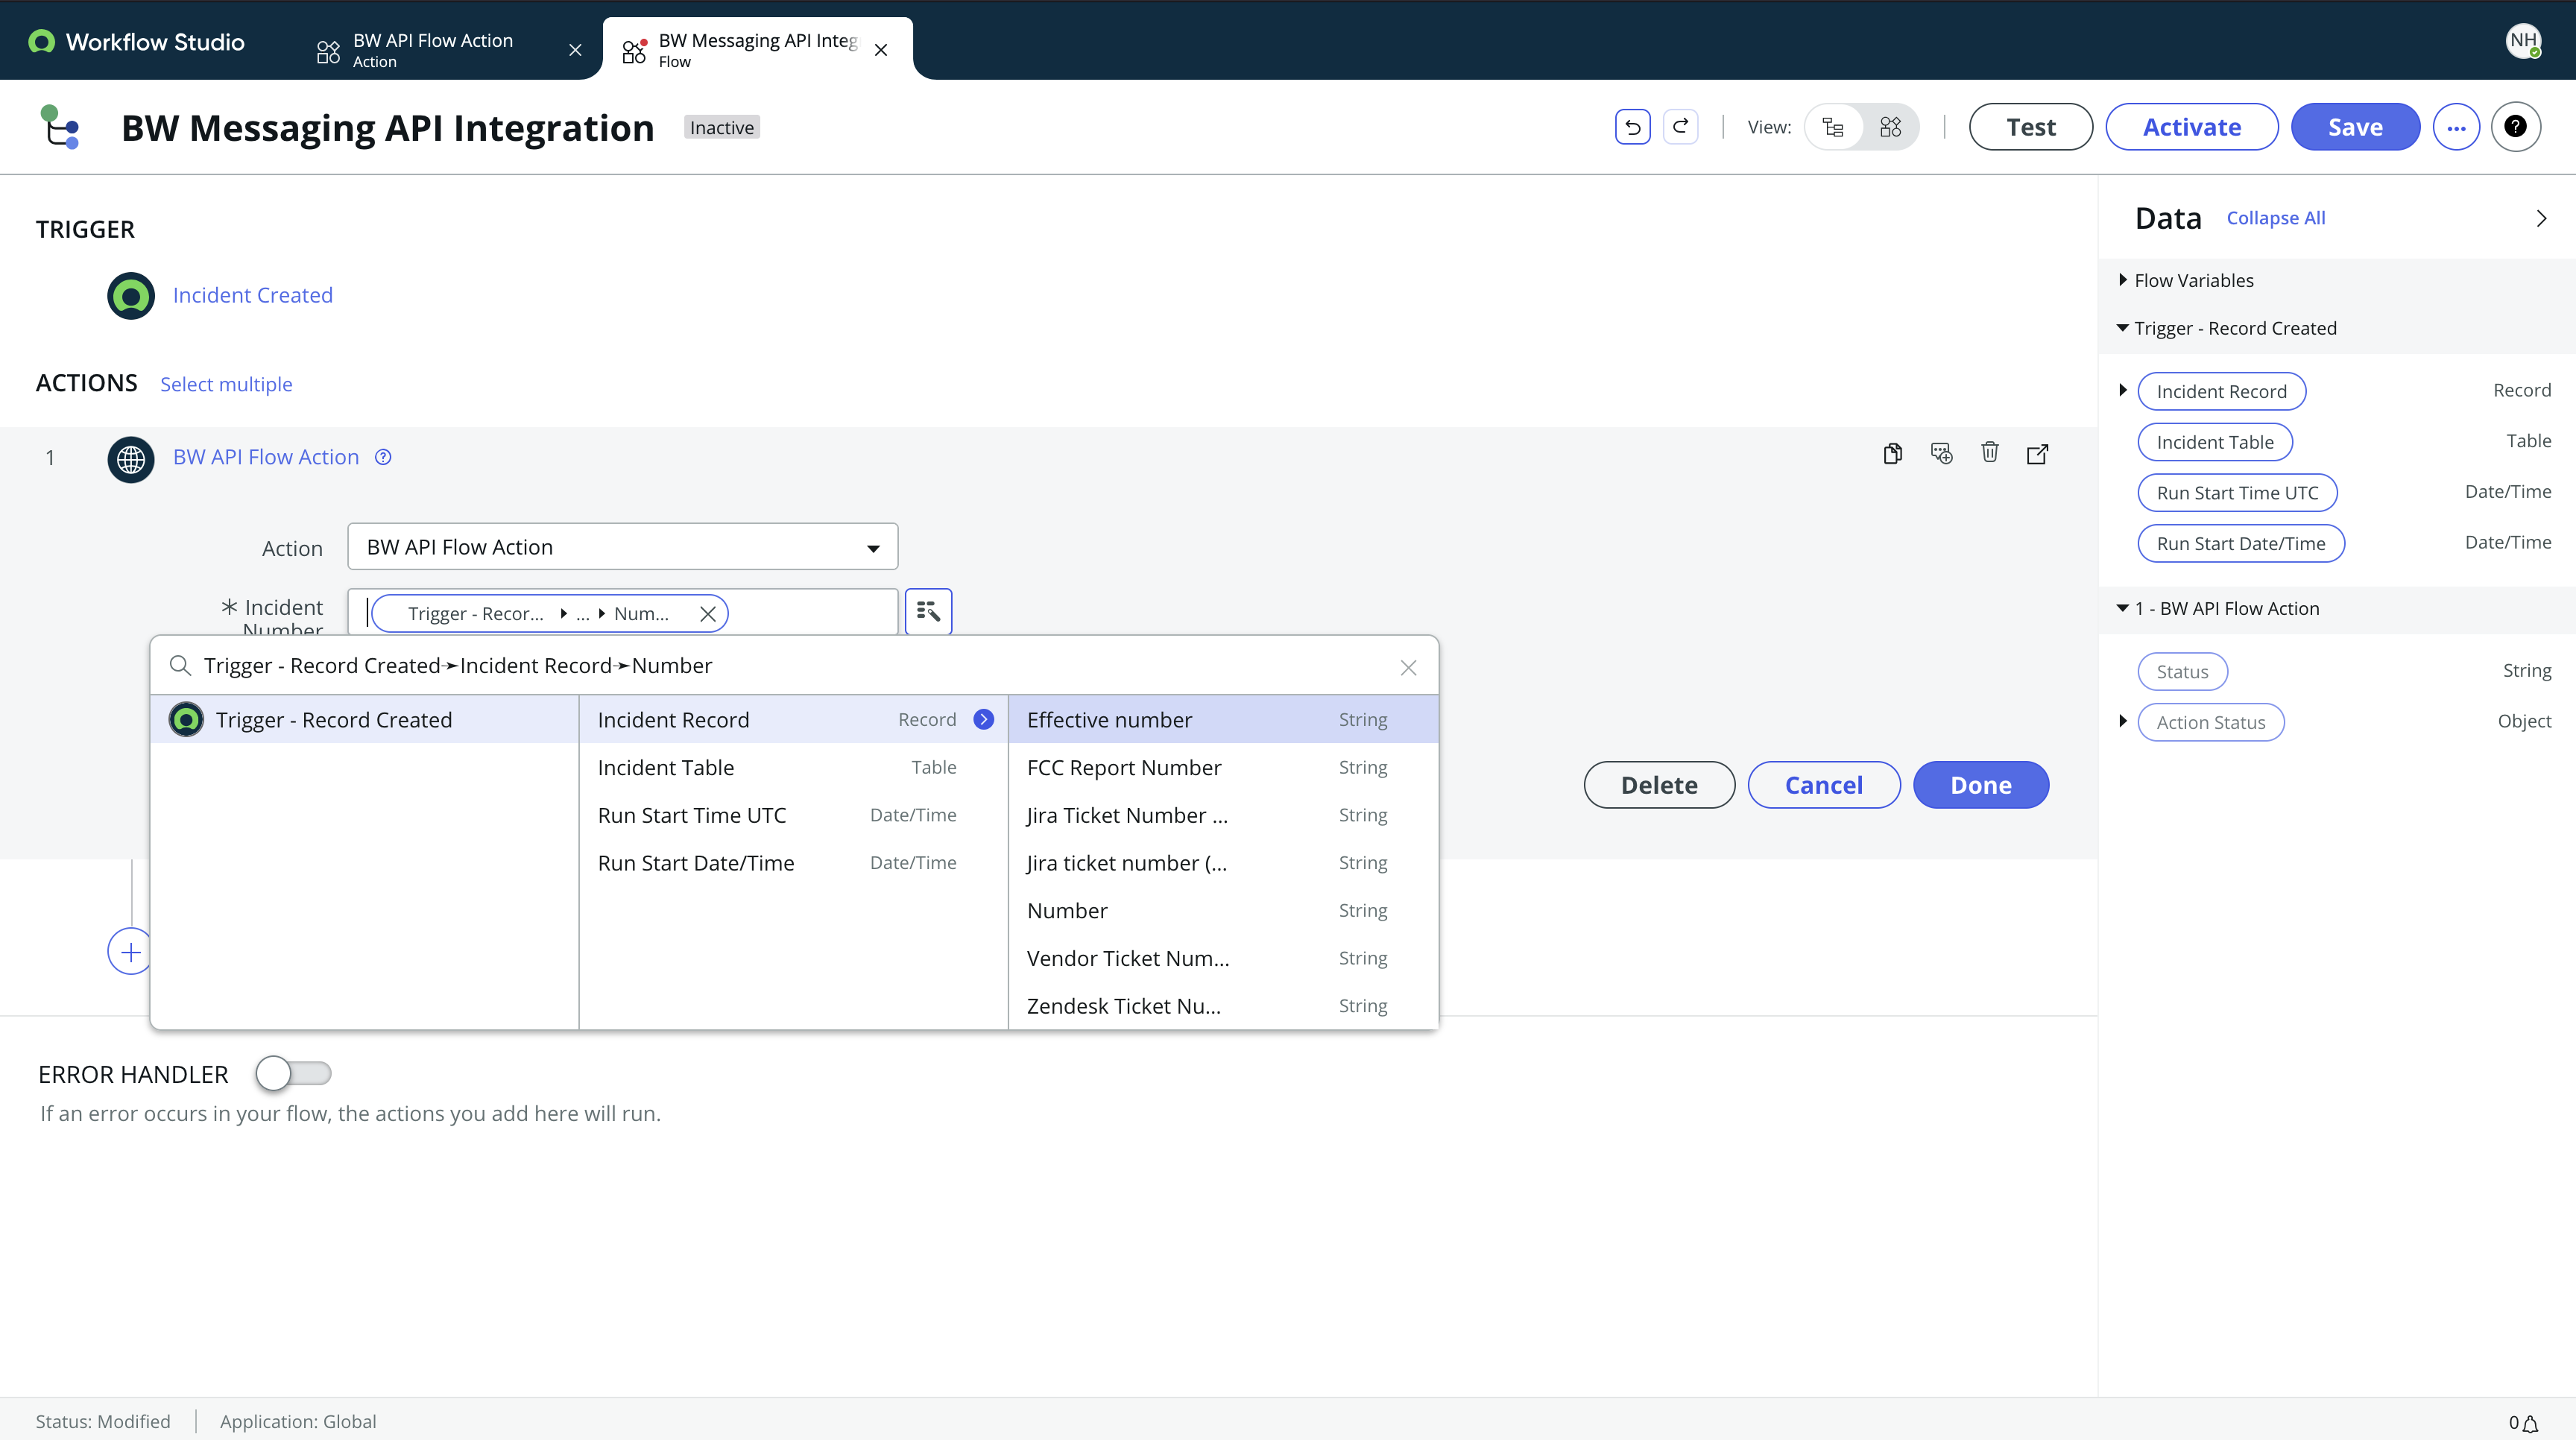
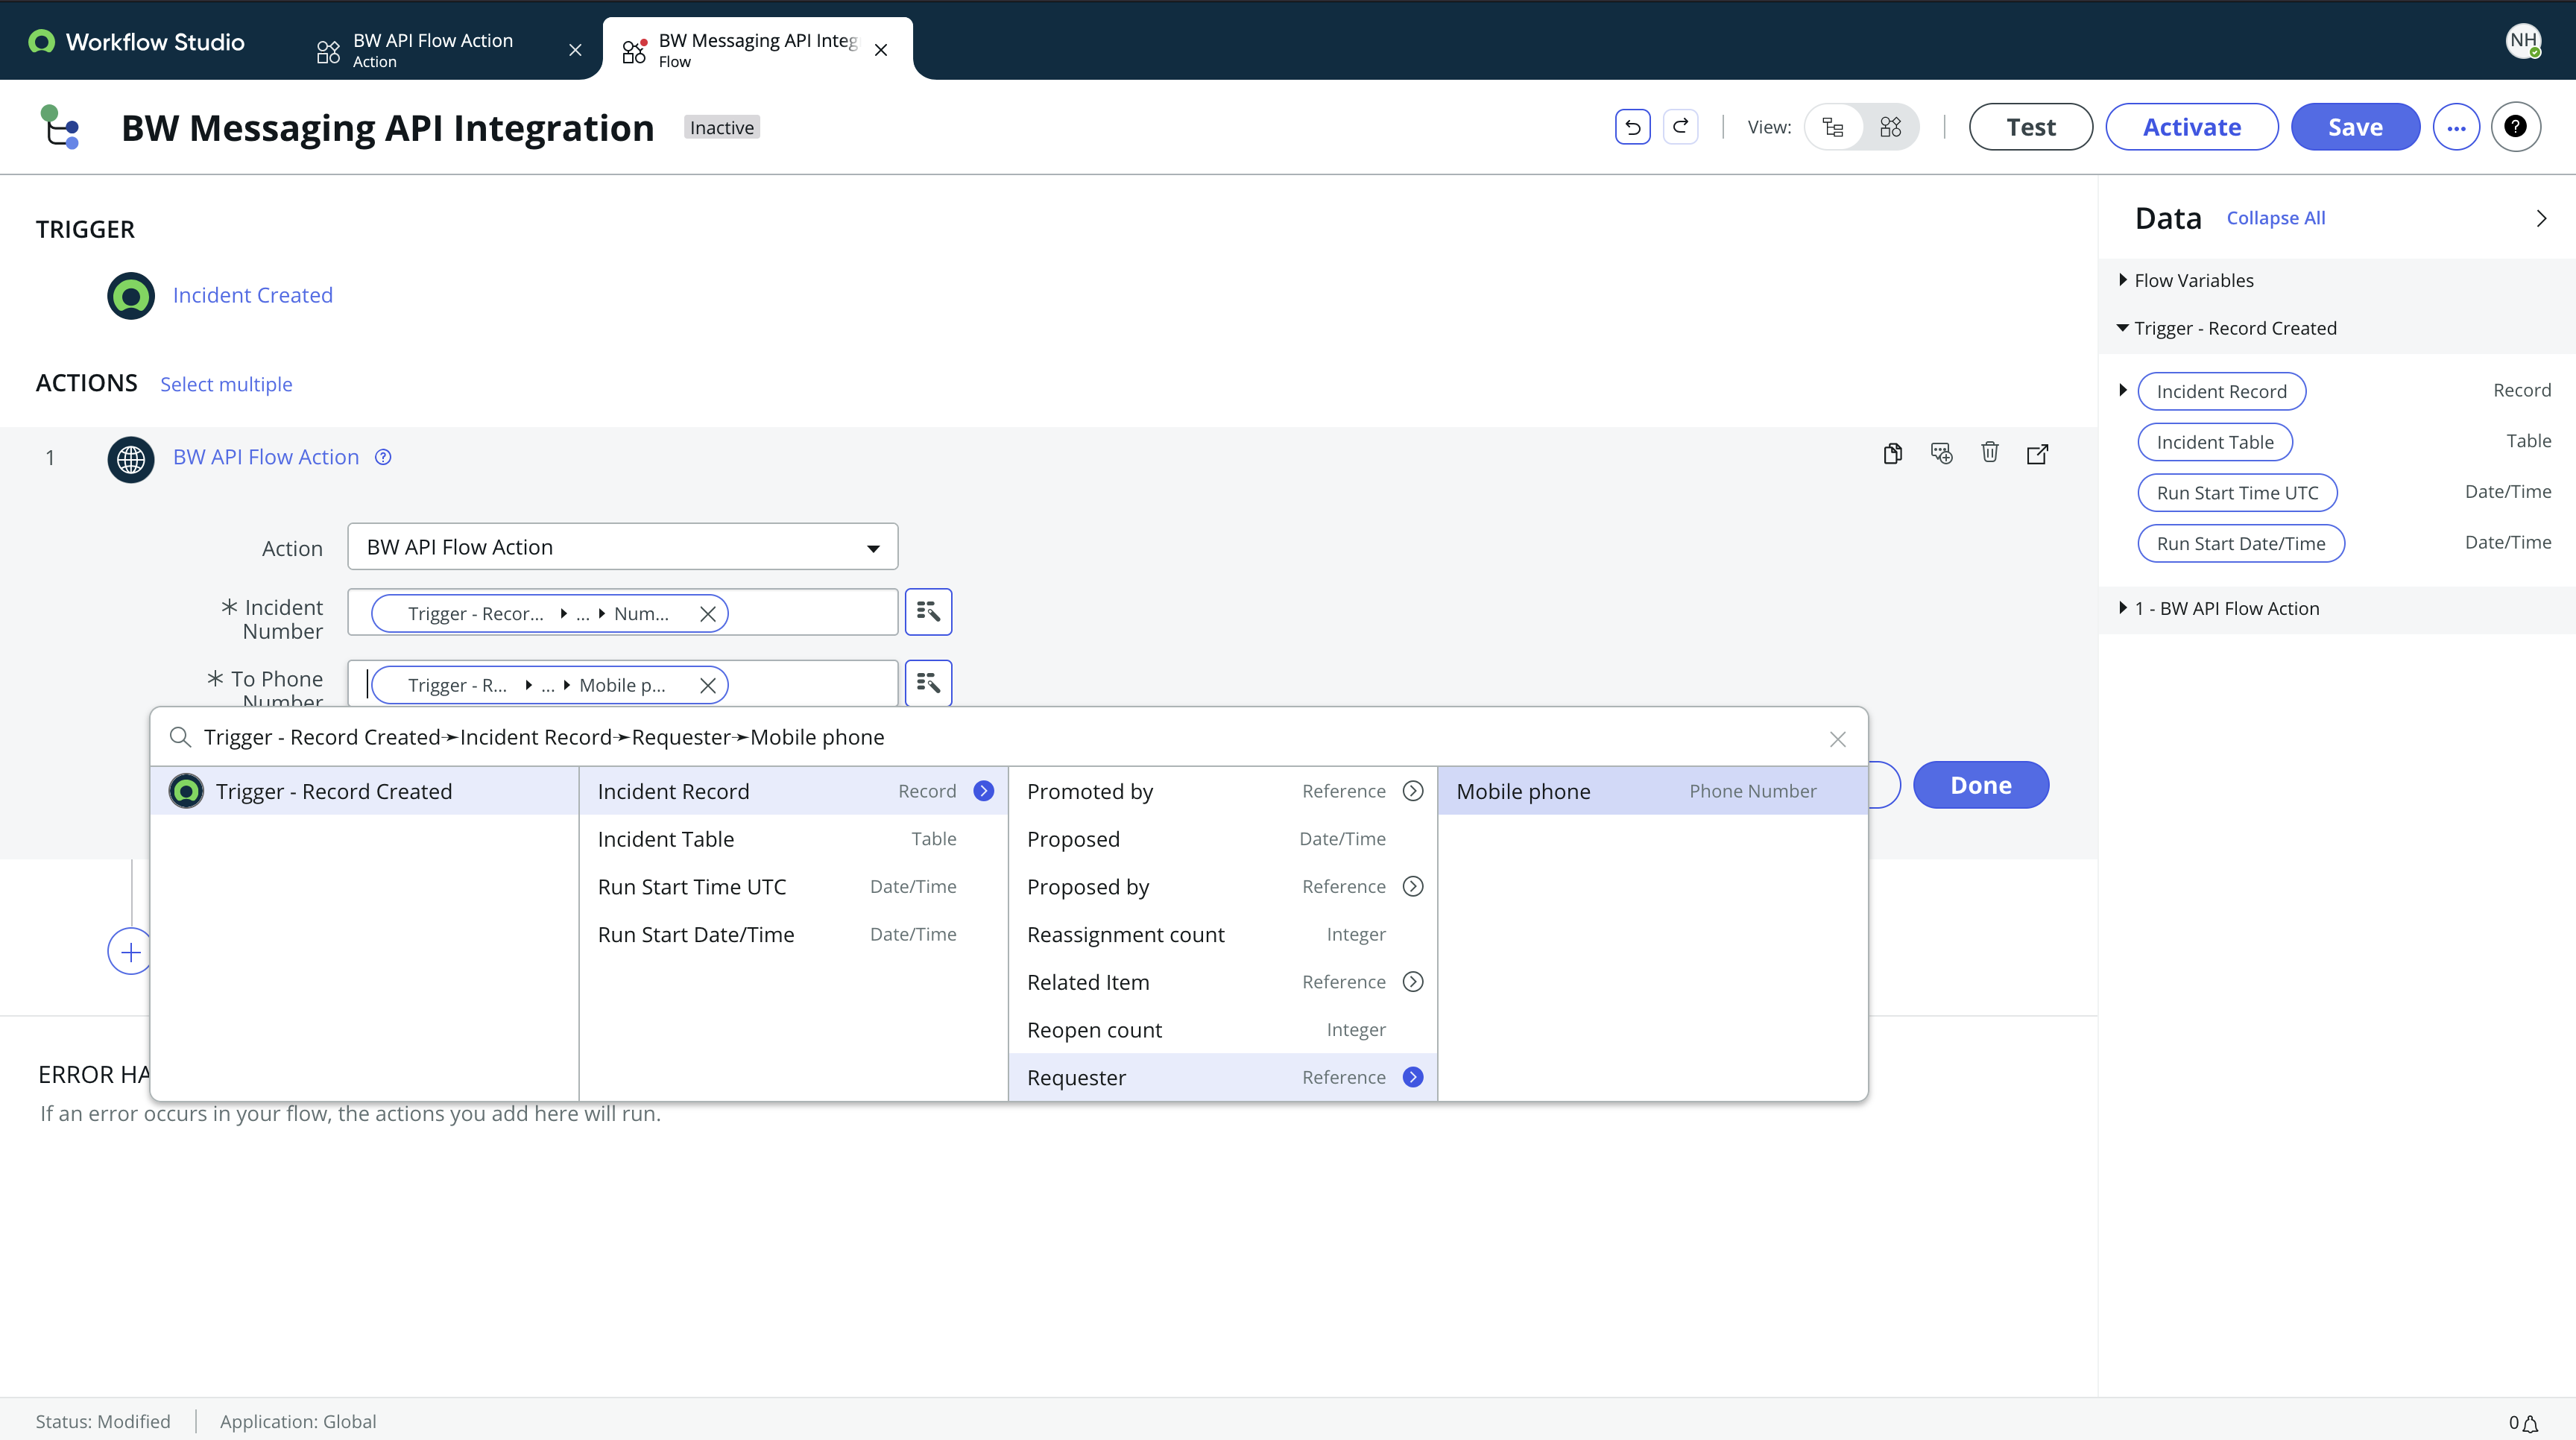
- Save and activate your flow.
With your flow activated, you should now be able to send SMS messages from your ServiceNow instance using Bandwidth's Messaging API.