Bandwidth 10DLC Campaigns Import UI Guide
This walks through how to import and view your campaigns through the Bandwidth App for use with our Number Management and Messaging API's.
Assumptions
- You have been contracted and given access to your Bandwidth Account
- Your account has Messaging and Campaign Management products enabled
- Your account has 10dlcImportCampaigns product feature enabled
- Your account has your CSP ID associated to it
- You have provisioned campaigns with The Campaign Registry (TCR) through your Campaign Service Provider (CSP)
- You have shared your provisioned campaigns with Bandwidth DCA
Important Notes
- We only allow imports for campaigns that have been approved by all carriers participating through TCR. While provisioning your campaigns through your CSP, make sure to provision with all participating carriers. If you are registering as your own CSP, exclude the 'mnoIds' property on the TCR CSP /campaigns/campaignBuilder endpoint request body. If you do not provision to all carriers, you will have to either work with TCR to remedy or create another campaign in which both campaigns will be subject to fees.
- Campaign has not yet been shared error message - cron re-tries every hour. TN won't be eligible for TN Association.
Steps
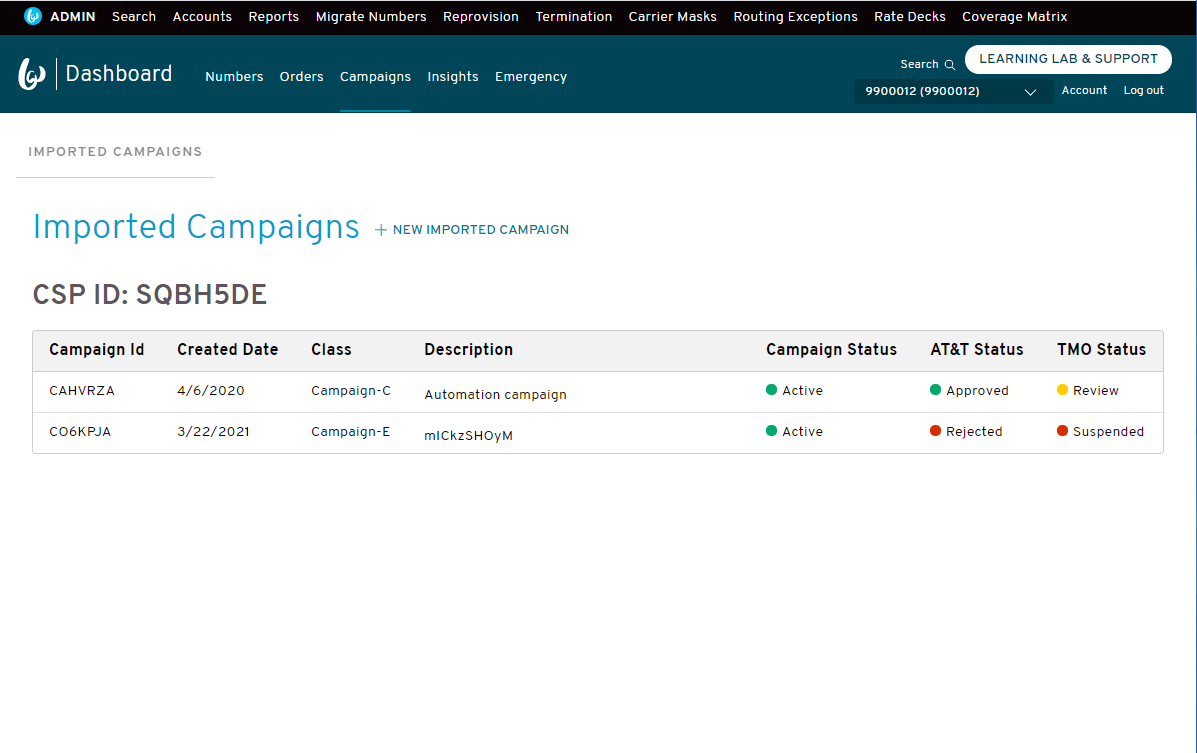
View imported campaigns
Once you log into the Bandwidth App, you should see Campaigns in the navigation bar. If you select it, you will be routed to the IMPORTED CAMPAIGNS sub navigation which is where you will see a list of the campaigns that have been previously imported on your account.
Import a campaign
While on the imported campaign list page, you have the option to select the '+ NEW IMPORTED CAMPAIGN' button. This will display a popup modal which allows you to enter the ID of the campaign you want to import.
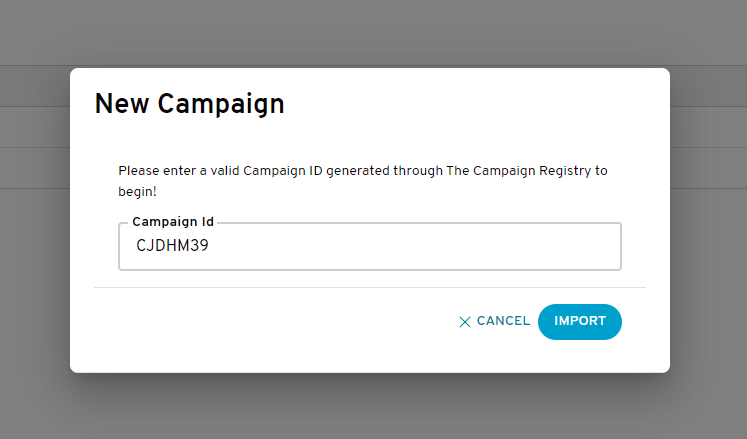
Note: If you get an error message while importing, it is likely that -
- your CSP ID on your account is incorrect,
- the campaign has not yet been shared with BANDW DCA
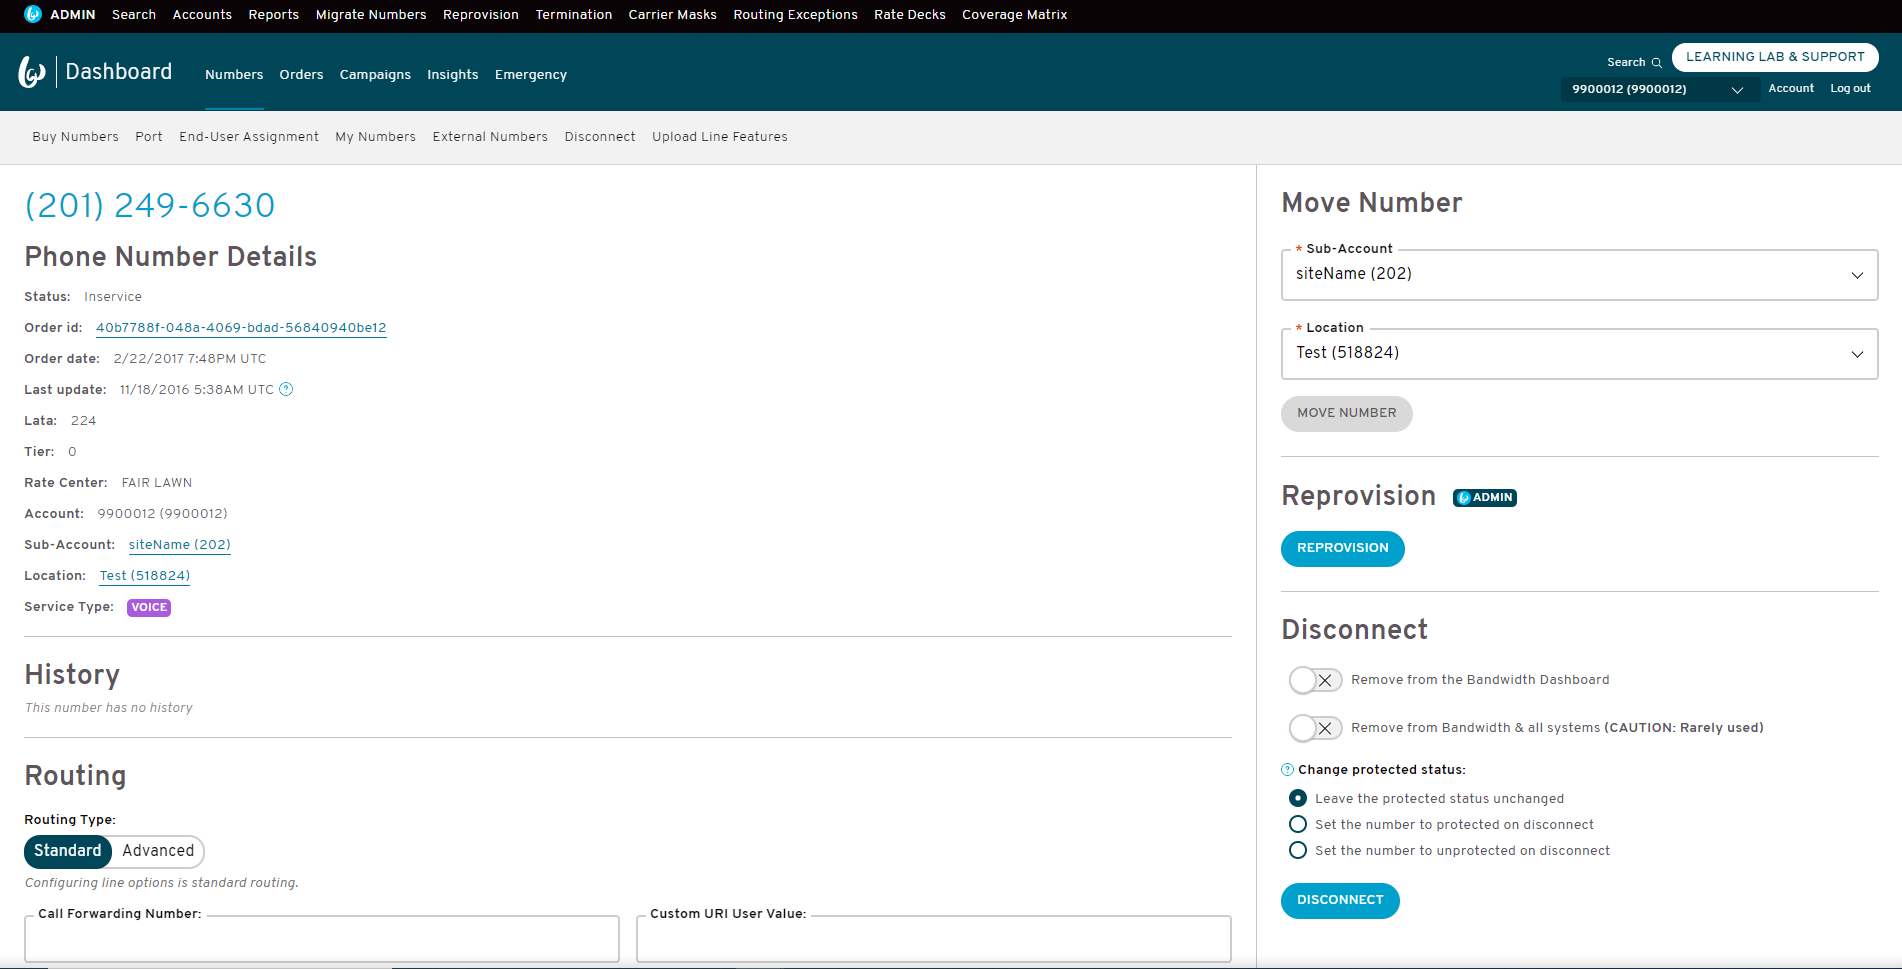
Assign a campaign to a TN
You should see Numbers in the navigation bar. If you select it, you will be routed to a sub navigation where you will see My Numbers. If you select it, you can search for a TN and view the details page.
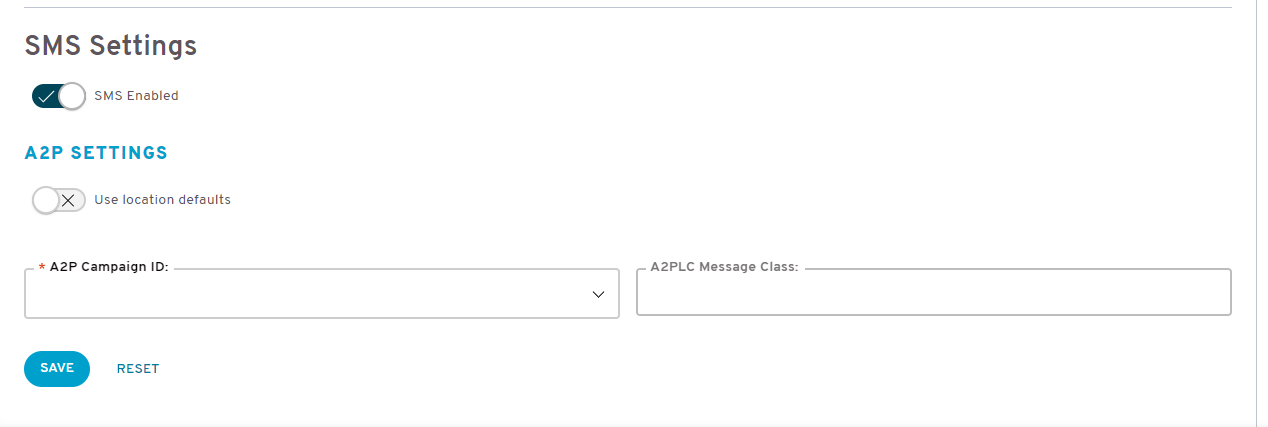
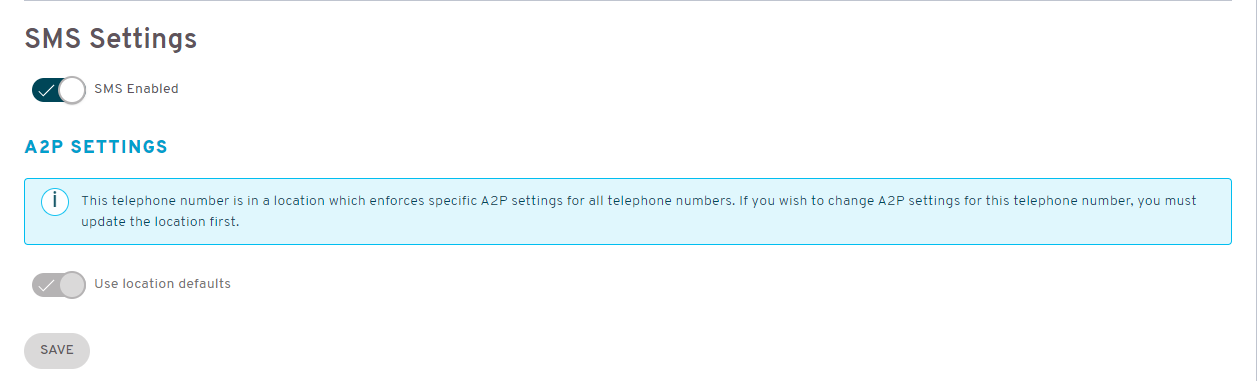
Once on the TN details page, you can scroll to the bottom where you will see SMS Settings.
Ensure SMS Settings is on, and that use location defaults is off.
You will see a dropdown labeled A2P Campaign ID.
Your imported campaigns will be found in the dropdown.
When you select a Campaign ID the Message Class field will auto-populate with the message class assigned from TCR.
When you click the Save button, the TN will be associated with the Campaign ID and will be ready for use.
Note: If you don't see the Campaign ID in the dropdown, it's likely that -
- it has not been approved by all Mobile Network Operators (MNOs),
- it has been deactivated or expired
For a full list of status values and descriptions, please see our campaign FAQs

Note:
If you are not able to turn location defaults off, you will need to reach out to the implementation team to disable 'Enforce Location Long Code Settings' on your locations. -
For more info on TNs, please see our number ordering guide
Bulk Assign a campaign to multiple TNs
You should see Numbers in the navigation bar. If you select it, you will be routed to a sub navigation where you will see Upload Line Features. If you select it, you will see the Choose a .csv file to import field.
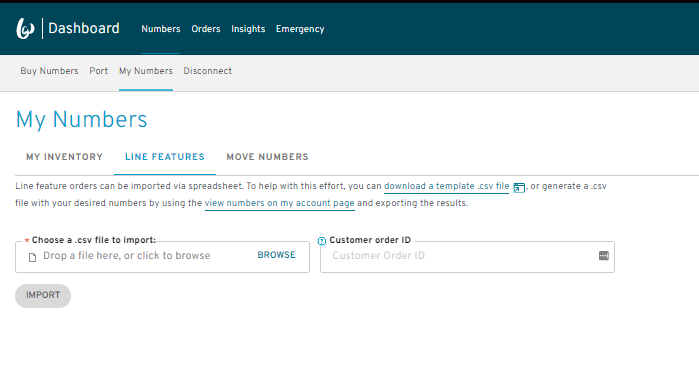
Sample CSV format is as follows - Downloadable Sample
| TN TN | A2pSettings CampaignId | A2pSettings Action |
|---|---|---|
9192491000 | CABCDEF | asSpecified |
9192491001 | CEFGHIJ | asSpecified |
9192491002 | C0123456 | asSpecified |
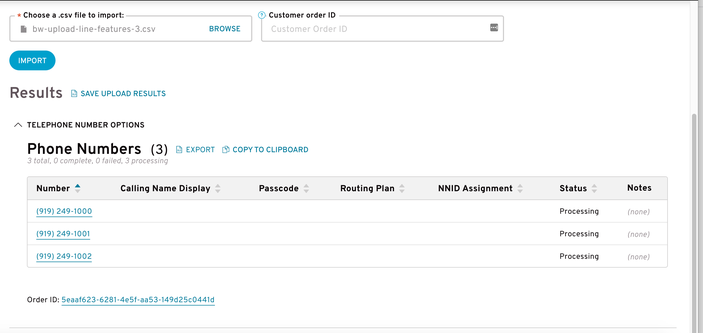
Once you click the Import button the TNs will be processed. Upon successful completion, the TNs will have the appropriate Campaign ID assigned and will be ready for use.
For more info on TNs, please see Managing Line Features
Next steps
Create an API-only user
Create your API Credentials to validate your API calls.
Start developing to our Messaging APIs
After you've finished importing your campaigns, explore our inventory and order a phone number to your account. Once you have a phone number, you are ready to send your first text message. For help, check out our SDK's and Postman Collection.